How to Plan a Photo Shoot for Flawless Results
Planning a photo shoot is so much more than just showing up with a camera. It’s about methodically piecing together a puzzle—defining your vision, creating a mood board and shot list, scouting locations, and wrangling all the logistics like talent and gear. This whole pre-production phase is where you translate a great idea into a foolproof, actionable plan that guides every single decision from here on out.
Defining Your Vision Before You Touch a Camera
Every truly great photograph starts with a decision made long before anyone even thinks about clicking the shutter. That initial discovery phase? That’s where the real magic happens. It’s where you take a fuzzy, half-formed idea and shape it into a focused, tangible concept.
This is the bedrock your entire project is built on. Without a crystal-clear vision, even the most technically gifted photographer will end up with a collection of beautiful, but ultimately meaningless, images.
This stage is all about asking the right questions. It doesn't matter if you're working with a big-name client or just planning a personal project for your portfolio; you have to dig deep into the "why." What's the end goal for these photos? Who are we trying to reach? What feeling or message are we trying to get across? Nail these answers down, and you'll have a North Star for your project, ensuring every choice—from the location to the lighting—serves that core objective.
Establishing Clear Goals and Objectives
Before you even think about models or locations, you have to define what success actually looks like for this shoot. The goals will completely change your entire approach. A commercial shoot for a new clothing line, for instance, needs a totally different strategy than an editorial spread for a magazine. If you want to dive deeper into narrative-driven work, you can explore our guide to editorial photography.
Think about these different scenarios:
- Commercial Campaign: The main goal is almost always to drive sales or boost brand awareness. Your photos need to be persuasive, perfectly on-brand, and tap directly into what the target consumer wants.
- Personal Branding Session: Here, the objective is to capture an individual’s personality and professional vibe. The images have to build trust and forge a genuine connection with their audience.
- Editorial Story: For this, you’re telling a compelling visual story that fits a publication's theme. The focus is all on narrative, mood, and artistic expression, not direct sales.
Getting this initial alignment right is non-negotiable. Portrait photography is one of the most common types of professional work, and the key to success in this niche is almost always obsessive pre-shoot communication. In our experience, photographers who invest real time in client consultations before the shoot consistently see higher satisfaction and more repeat business. This just proves that understanding the vision isn't fluff, it's a direct investment in the project's outcome.
Building Your Creative Brief
Once you've locked in the goals, it's time to pull everything together into a creative brief. This document isn't just a formality; it's the single most important communication tool you have. It ensures that everyone involved—from the client to the stylist to the makeup artist—is working from the same script. A solid brief nips misunderstandings in the bud and keeps the whole project from derailing.
A creative brief is your project's constitution. It outlines the rules, defines the objectives, and serves as the single source of truth when creative debates arise on set.
Your brief needs to clearly spell out the project's mission, target audience, and the emotional tone you're going for. It should also cover the key logistical details and visual guidelines that will shape the rest of your planning.
To get started, here's a quick checklist of the foundational questions your brief should answer. Working through these points ensures you and your client (or your team) have a clear and unified vision from day one.
Initial Photo Shoot Planning Checklist
| Planning Element | Key Questions to Address | Example Goal |
|---|---|---|
| Core Message | What is the one thing we want the viewer to feel or think? | To convey a sense of adventurous freedom and durability for a new hiking boot. |
| Target Audience | Who are we creating these images for? (Demographics, interests) | Millennials and Gen Z outdoor enthusiasts aged 22-35 who value sustainability. |
| Visual Tone | What is the overall mood? (e.g., bright, moody, cinematic, raw) | Warm, earthy, and authentic, using natural light to create a sense of realism. |
| Mandatories & Restrictions | Are there any specific products, logos, or brand colors to include? | The new logo must be visible but not overpowering in at least three key shots. |
Think of this table as the starting point for a much larger conversation. The more detail you can hash out here, the smoother the entire production will run.
Turning Your Big Idea into a Visual Blueprint
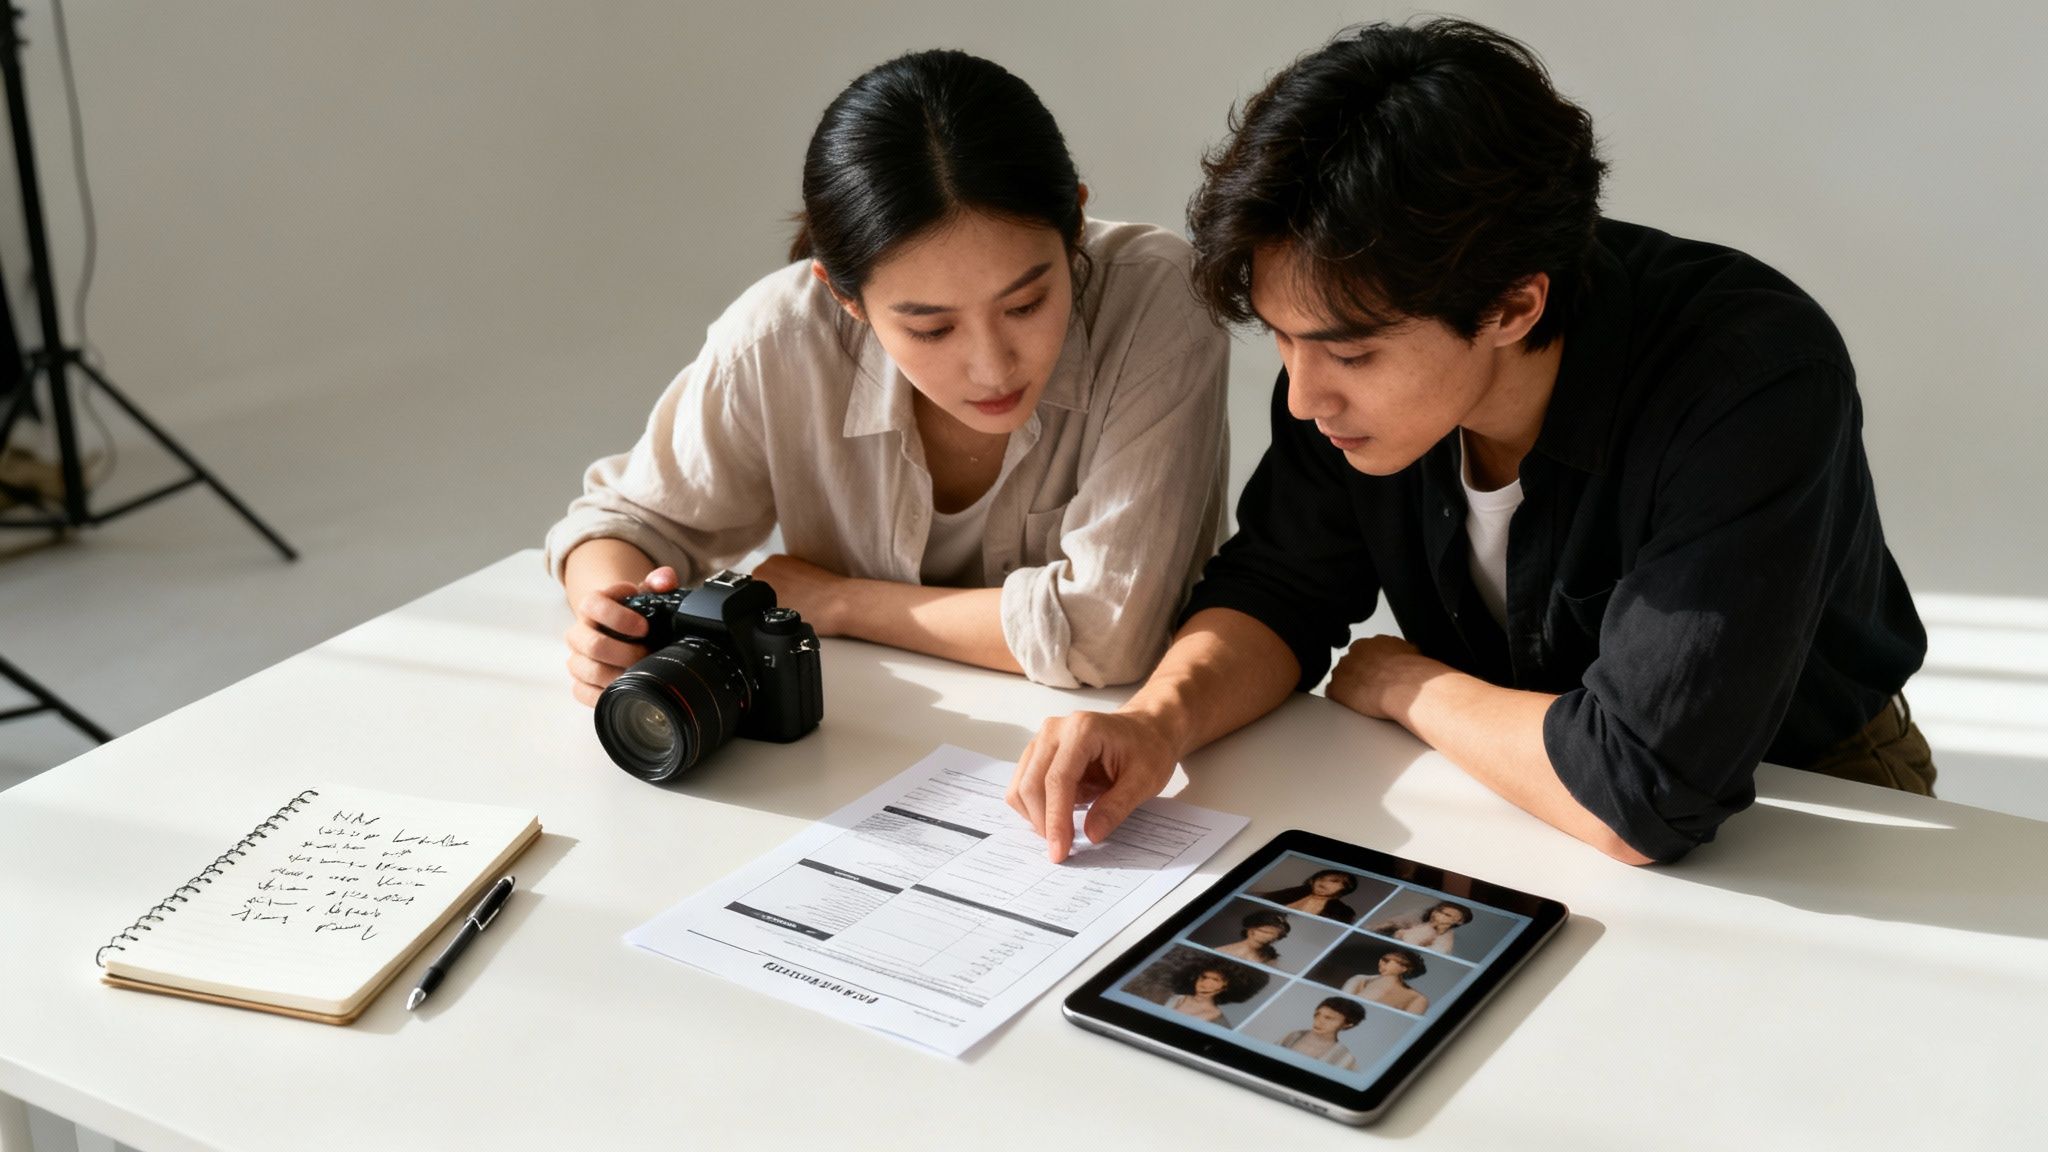
Alright, you’ve got a solid creative brief. Now comes the fun part: translating those abstract goals into a concrete visual language that everyone can understand. This is where you build the actual blueprint for the shoot day, ensuring your creative vision is clear, executable, and not just a bunch of ideas floating around.
This stage is all about bridging the gap between words on a page and the final images. If you skip this, you’re essentially winging it, leaving far too much to chance on the day. A well-crafted mood board and a ridiculously detailed shot list are the two tools that will save you from chaos and turn your concept into a predictable success.
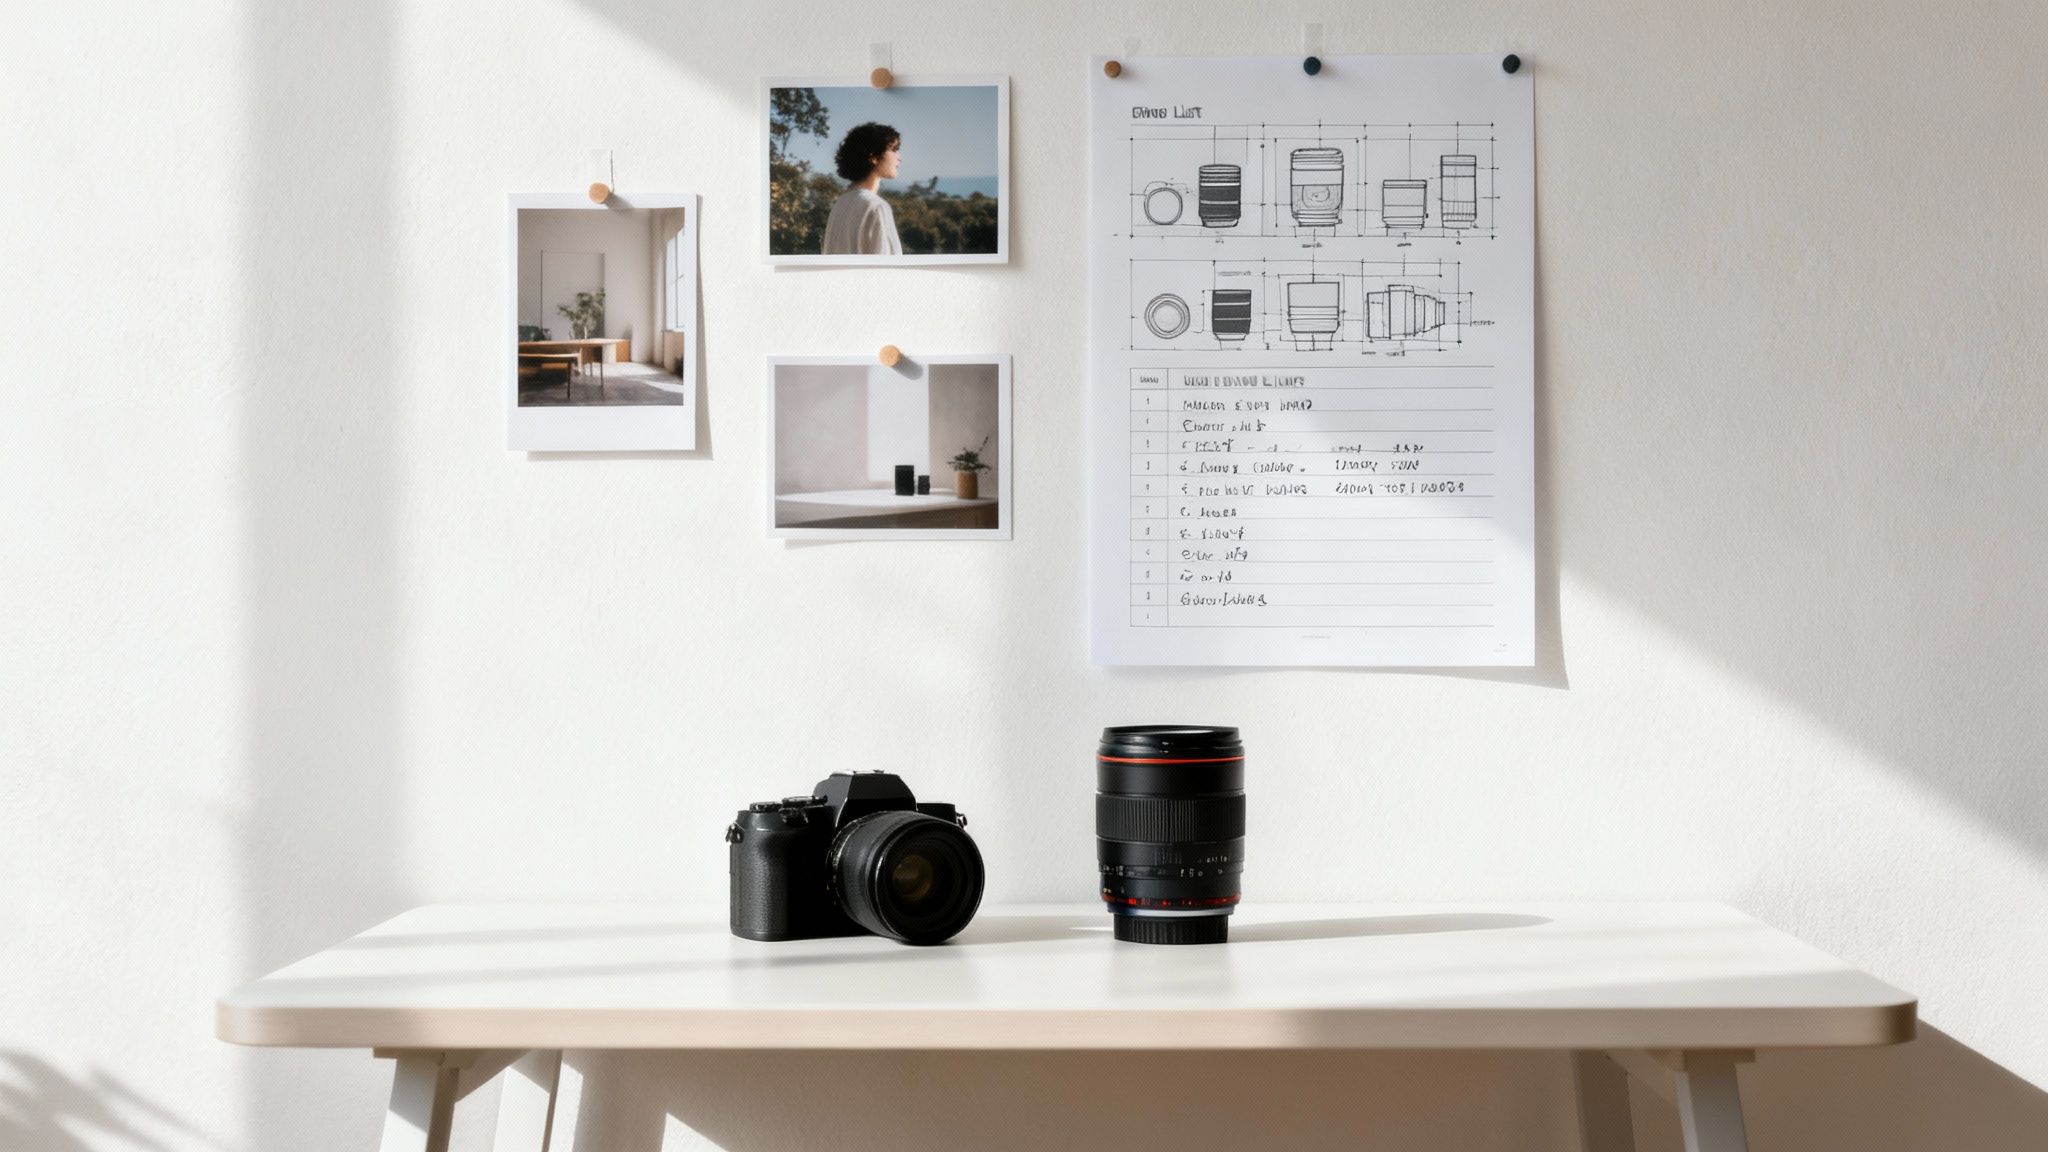
Nail the Vibe with an Actionable Mood Board
A mood board is so much more than a collage of pretty pictures; it's your most powerful communication tool. It’s a visual shorthand that defines the project's entire aesthetic—the color palette, lighting style, emotional tone, posing, you name it. It's the fastest way to get your client, stylist, and the whole team on the exact same page.
I live on platforms like Pinterest and Milanote for this. But don’t just pin images you like. You need to be intentional. I always organize my boards into specific categories to create a truly comprehensive guide.
- Lighting: Gather examples that show the quality of light you're after. Are we talking hard, dramatic shadows or soft, diffused light? That warm, golden hour glow or something cooler and more atmospheric?
- Color Palette: Pin images that represent the exact color story. This is invaluable for the wardrobe stylist, the set designer, and even the editor who will be color grading the final images.
- Composition & Angles: Include shots that demonstrate the framing you envision. Are you imagining wide, environmental portraits that show off the location, or are you after tight, intimate close-ups?
- Posing & Emotion: This is crucial. Collect references for how the talent should carry themselves. Should they feel powerful and confident, or soft and introspective?
For example, a family session mood board filled with candid, laughing moments in warm, natural light communicates a completely different vibe than one with formal, studio-lit portraits. Getting this right is everything. To really flesh out your vision, it's worth exploring different family photo backdrop ideas to see what resonates.
Craft a Meticulous Shot List (Your On-Set Bible)
While the mood board sets the tone, the shot list provides the structure. This document is your game plan for the shoot day, detailing every single image you absolutely must capture. A solid shot list ensures no critical photo gets missed and helps you manage your time like a pro.
A vague list like "photos of the product" just won't cut it. Your shot list should be a detailed spreadsheet or document that breaks down each required image with absolute clarity.
Think of your shot list as a recipe. Without it, you might end up with something edible, but with it, you guarantee a masterpiece. It removes guesswork and ensures you walk away with everything you need.
I build my shot lists with columns for every key piece of information. This level of detail empowers the entire team and makes the day run smoother than you can imagine.
Key Components of a Detailed Shot List
| Category | Description & Example |
|---|---|
| Shot Number | A unique ID for easy reference (e.g., Shot 001, Shot 002). This helps keep everyone organized on set. |
| Description | A clear summary of the scene (e.g., "Model sitting on a stool, laughing over her shoulder towards the window."). |
| Framing | The specific shot type (e.g., Full-length, Medium shot, Close-up on hands holding the product). |
| Angle & Lens | Camera position and lens choice (e.g., "Eye-level, 50mm f/1.8"). |
| Lighting Notes | Any specific lighting instructions (e.g., "Soft window light from camera left, use reflector for fill."). |
| Wardrobe & Props | Exactly what the model should wear and any props needed (e.g., "Outfit #2, holding a white coffee mug."). |
| Priority Level | Mark shots as "Must-Have" or "Nice-to-Have." This is a lifesaver if you start running short on time. |
This detailed approach turns what could be a chaotic creative process into a manageable, step-by-step execution. When everyone knows what needs to be captured next, the entire day becomes more focused, efficient, and, ironically, leaves more room for genuine creativity.
Mastering Location and On-Set Logistics
A great location is so much more than a pretty backdrop; it’s a character in your story. Choosing the right space is one of the most critical parts of planning a photo shoot because it sets the entire tone and directly shapes the final images. The perfect spot doesn't just look good—it brings your mood board to life, transforming a concept into a tangible world.

But finding that spot is only half the battle. The on-set logistics are a tangled web of practical details—from securing permits and power access to having a solid weather contingency—that can absolutely make or break your shoot day. Getting these elements right is what ensures a smooth, professional, and stress-free execution.
The Art of Strategic Location Scouting
Effective location scouting isn’t just a quick Google search for "cool places to shoot." It demands a sharp eye for detail and a really practical mindset. When you're out checking potential locations, you have to think like a photographer, a producer, and a safety manager all at once.
My number one rule? Visit your top choices at the exact time of day you plan to shoot. This is non-negotiable. The way light falls in a park at 8 AM is completely different from how it looks at 4 PM, and this will dramatically change your images. If you want to dive deeper into this, we have a whole guide on finding the best time of day for outdoor photography.
Once you've got a handle on the light, it's time to get practical:
- Power Access: Will you need to power strobes, laptops, or charging stations? Find the outlets or have a plan to bring portable power packs.
- Amenities: Are there accessible restrooms? A private spot for wardrobe changes? These small comforts make a huge difference to morale on a long shoot day.
- Foot Traffic: How busy is the location? A crowded public space can fill your background with unwanted people and create constant interruptions. Timing is everything.
For really specific shoots like Twilight Real Estate Photography, this level of obsessive planning is what separates good from great. Precision starts with the right location.
Navigating Permits, Insurance, and Releases
The legal and admin side of a photo shoot is easy to overlook, but ignoring it can get you hit with costly fines or even a complete shutdown of your production. Never, ever assume you can just show up and start shooting, especially in public parks, on city streets, or on private property.
First things first, look into permit requirements. A quick call to the local city office or a visit to the park authority’s website will tell you what you need. This process can take weeks, so it should be one of the first things you do after you’ve settled on a location.
Next up, get the right insurance. General liability insurance is a must-have. It protects you, your client, and your crew from accidents or property damage. In fact, many venues will demand a Certificate of Insurance (COI) before they even let you on the property.
Finally, don’t forget the paperwork:
- Property Release: If you're shooting on private property, you need a signed release from the owner. This gives you the legal right to use the images commercially.
- Model Release: This is usually handled during casting, but double-check that every single person on camera has signed a release form.
Think of permits and insurance as your professional safety net. They feel like tedious paperwork, but they're what separate an amateur shoot from a professional production.
Building a Bulletproof Logistical Plan
With your location locked in and paperwork sorted, it’s time to map out the day's logistics. The goal here is to eliminate as many surprises as possible so you can stay focused on the creative work. A solid logistical plan should cover transportation, contingency plans, and on-set coordination.
Start with a crystal-clear transportation plan. How will the crew, talent, and all that equipment get to the location? Provide clear directions, parking details, and any specific load-in instructions. If you’re hauling a lot of gear, it’s often worth arranging a dedicated vehicle or an assistant just for transport.
Contingency planning is all about preparing for what could go wrong. What’s your backup plan if it rains? For any outdoor shoot, you absolutely need an indoor alternative scouted and ready to go. What if a key piece of equipment fails? Having backups on hand or knowing the closest rental house can save your entire day. This proactive approach turns potential disasters into minor hiccups, keeping the shoot on track and everyone’s stress levels down.
Assembling Your Creative Dream Team
You've nailed down the vision and sketched out the blueprint. Now for the fun part: bringing together the incredible people who will help you bring it all to life. The success of any photo shoot almost always comes down to the talent you have on set, both in front of and behind the camera. This is where a great idea transforms into something truly stunning.
Putting this team together is a pivotal moment in your planning. It’s all about finding professionals whose unique style and skill set click perfectly with the world you've built in your mood board and creative brief.
Casting Talent That Embodies Your Vision
The model is the heart of your story, the person who will carry the narrative. This makes casting a decision you really need to get right. You’re not just looking for a specific "look"—you’re searching for someone who can genuinely convey the emotion and energy you've envisioned. Think of them as the perfect messenger for your concept.
So, where do you find these people?
- Social Media: Instagram has become a surprisingly powerful casting tool. I've found amazing new faces by searching targeted hashtags like #londonmodel or #nycfashion. A polite, professional DM that clearly outlines the project is a great way to start a conversation.
- Your Network: Never underestimate the power of your creative community. Tap into your network of photographers, stylists, and makeup artists. They almost always have a go-to list of models they trust and love working with.
- Modeling Agencies: If you're working on a commercial project with a solid budget, going through an agency is the way to go. They offer professional, vetted talent, which takes a lot of the guesswork out of the process.
When you put out a casting call, be crystal clear about the look, vibe, and even the personality traits you need. Always ask for recent, unedited photos (often called digitals or "polaroids") to get a true sense of their natural appearance.
Finding and Vetting Your Creative Crew
Beyond your model, the creative crew—the makeup artist (MUA), hair stylist, and wardrobe stylist—are the architects of the final image. Hiring the right people here is just as important as finding the right photographer for a huge event, a process we dive into in our guide on how to choose a wedding photographer. The same core ideas apply: vet their portfolios, check for stylistic consistency, and make sure their vibe matches yours.
When you start reaching out to potential crew members, your mood board is your single most important tool. Share it right away. It’s the fastest way to communicate the visual direction you’re aiming for. A stylist who’s a genius with edgy, high-fashion concepts might not be the best fit for a shoot that needs to feel soft and natural.
Look for a portfolio that shows they can consistently produce high-quality work in a style that resonates with your project. Don't hesitate to ask for a few references or hop on a quick call to chat about their process. That initial conversation is a fantastic way to feel out their professionalism and see if you’ll work well together.
A cohesive team that understands and believes in the creative vision will always produce better work. The energy on set is infectious, and when your crew is in sync, that positive, collaborative spirit shows up in the final images.
Talking about money is just part of the job. Be transparent about your budget from the start. Most professionals have set day rates, but they might be flexible depending on the project's scope or if it's a great opportunity for their portfolio. Just be sure to get everything in writing—the agreed-upon rate, usage rights, and payment schedule—to prevent any misunderstandings down the road. Building this team is an investment, but it’s one that pays off big time on shoot day.
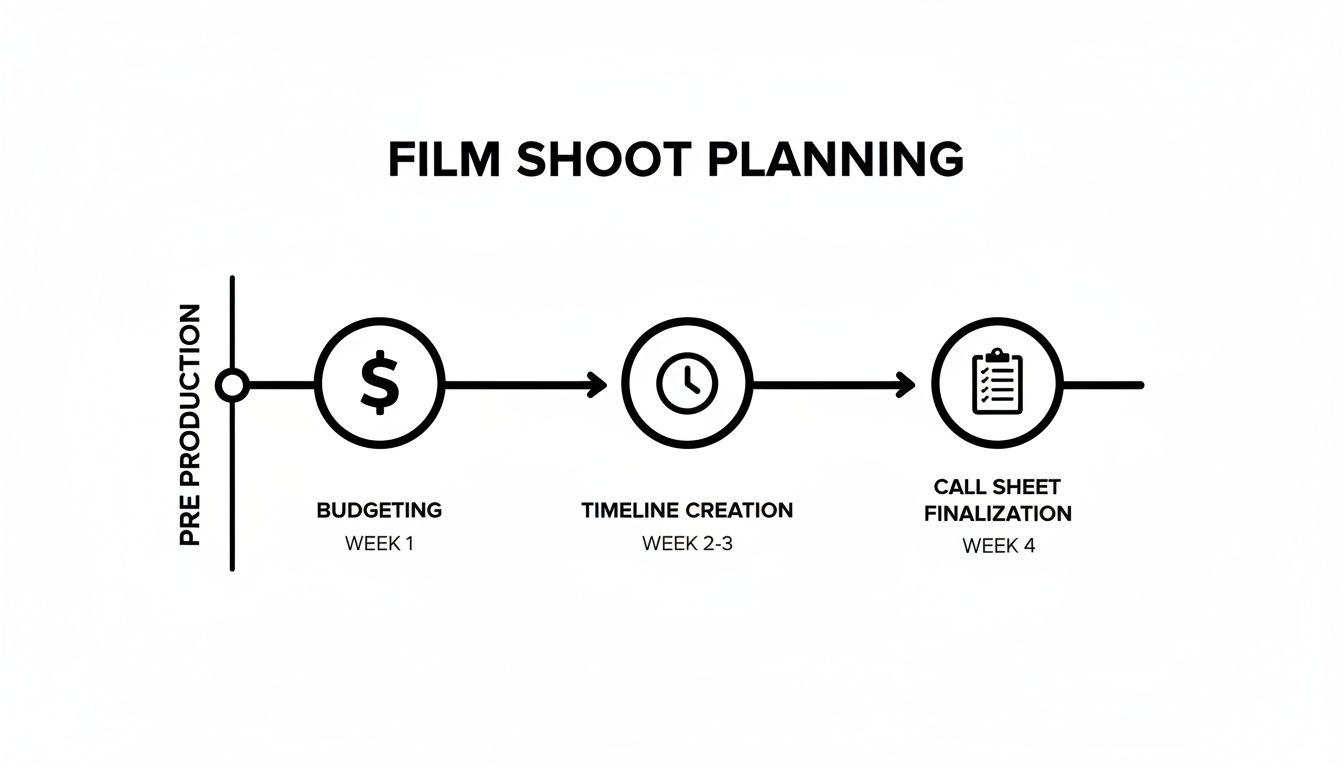
Nailing the Logistics: Budget, Timeline, and Call Sheet
Alright, you’ve got the vision, the mood board is inspiring, and your team is starting to come together. Now for the part that separates the pros from the amateurs: the administrative backbone. This is where we get into the nitty-gritty of the budget, the shoot day timeline, and the all-important call sheet.
Frankly, this isn't the glamorous side of photography, but mastering it is what turns creative chaos into a smooth, professional operation. These documents are your roadmap and your financial guardrails, ensuring everyone is on the same page and the project doesn't go off the rails.
Building Your Photo Shoot Budget
A solid budget is your best friend. It manages expectations, keeps you profitable, and prevents those heart-stopping surprise costs. For a standard commercial shoot, you could be looking at a total cost between $1,000 and $3,000. It’s easy to see how when you realize gear alone can eat up 40% of that. Throw in location scouting, which can take up 25% of your prep time, and a great stylist who might add 15-30% to the final invoice, and you see why every line item matters. You can dig into more photography industry statistics on behindmud.com to get a feel for the numbers.
To keep things organized and avoid overlooking costs, I always break my budgets down into three phases.
- Pre-Production: This is everything that costs money before shoot day. Think location scouting fees, city permits, sourcing props, and paying deposits for your talent and crew.
- Production: These are your day-of expenses. This is usually the biggest chunk of the budget, covering crew rates (your fee, assistants, stylists), talent fees, equipment rentals, the location itself, catering, and insurance.
- Post-Production: This covers all the work that happens after the camera is put away. We're talking standard retouching, any complex editing, and costs for image delivery or gallery hosting platforms.
Pro Tip: Always, always add a contingency line item of at least 10-15%. This isn't just fluff; it's your safety net for when you need an extra hour in the studio or have to make a last-minute run for a forgotten prop. It happens. For a deeper dive, check out this guide to mastering financial management for creative projects.
Crafting a Realistic Shoot Day Timeline
Your timeline is the script for the shoot day, broken down minute-by-minute. A vague schedule is a recipe for wasted time, missed shots, and a stressed-out crew. The trick is to be realistic and, just as importantly, build in buffers.
I find it easiest to work backward from the wrap time. A shoot day is so much more than just clicking the shutter.
Here’s what a typical 8-hour day might look like:
- Crew Call (8:00 AM): The core team gets in to start setting up gear, running lighting tests, and doing a final walkthrough of the space.
- Talent & Styling (9:00 AM): The model arrives and goes directly to hair and makeup. Don’t underestimate this—it can easily take 1-2 hours.
- First Shot (10:30 AM): Time to start shooting. Block out specific chunks of time for each look or setup from your shot list.
- Lunch (1:00 PM): This is non-negotiable. A fed crew is a happy, productive crew.
- Afternoon Shots (2:00 PM): Back to it. Work through the rest of the shot list, allowing time for any wardrobe or set changes.
- Wrap & Breakdown (4:00 PM): After the final shot, the crew starts packing up gear and cleaning the location.
For bigger productions with more moving parts, a pre-built framework can be a lifesaver. You might find our event planning timeline template is a great starting point for building out more complex schedules.
The Essential Call Sheet
If the timeline is the script, the call sheet is the playbill. It’s the master document that pulls every bit of planning into a single, easy-to-read page. You send this out the evening before the shoot, and it tells every single person exactly where to be, when to be there, and what to expect.
A great call sheet instantly communicates professionalism. It shows you respect everyone’s time and sets a confident, organized tone before anyone even steps on set.
There's no room for guessing games here. Your call sheet has to be crystal clear.
What to Include on Every Call Sheet:
- General Info: Project name, shoot date, and a quick look at the weather forecast.
- Addresses: The exact location address, detailed parking instructions, and a Google Maps link.
- Key Contacts: Names and phone numbers for the producer, photographer, and main client contact.
- Team Roster: A complete list of all cast and crew, their roles, and their individual call times.
- Detailed Schedule: The full, minute-by-minute timeline you already created.
- Emergency Info: The name and address of the nearest hospital. Better safe than sorry.
This one document becomes your on-set bible. It’s what keeps the entire day running like a well-oiled machine.
Common Questions About Planning a Photo Shoot
Even the most seasoned pros have questions. When you're trying to line up a creative vision with real-world logistics, things can get complicated. Let's tackle some of the most frequent questions that come up during the planning phase.
How Far in Advance Should I Plan a Photo Shoot?
There's no magic number here—it all boils down to the scale of your project.
For a simple portrait session with one person at a single location, you can probably pull it all together in 1-2 weeks. That's usually enough time to align schedules and nail down the creative direction without much stress.
But if you're orchestrating a bigger commercial shoot? You'll want to give yourself a much longer runway. Think multiple locations, a full crew, casting talent, and sourcing specific props. For that kind of production, 4-6 weeks is a safe minimum. This buffer is crucial for scouting the right spots, getting permits in order, and coordinating a dozen different schedules. For major ad campaigns, the planning process can easily stretch across several months.
What Is the Biggest Planning Mistake to Avoid?
The most common trap I see people fall into is glossing over the pre-production work. They have a brilliant idea in their head but don't build the practical roadmap to get there on the shoot day.
This usually shows up in two ways: a vague shot list and an overly optimistic timeline.
Without a detailed shot list, the day dissolves into chaos. People stand around confused, you miss critical shots, and valuable time gets wasted. A close second is not building any buffer time into your schedule. Something will go wrong. Gear can fail, talent can get stuck in traffic, or the weather can suddenly turn. A timeline that's packed to the minute is just asking for trouble and forces you to make creative sacrifices on the fly.
How Can I Create a Realistic Photo Shoot Budget?
Building a solid budget starts with listing out every single thing you could possibly spend money on. Don't eyeball it. The best way to keep it manageable is to break it all down into categories so nothing slips through the cracks.
I always split my budgets into three main phases:
- Pre-Production: These are all the costs that hit before anyone steps on set. Think location scouting fees, casting costs, permit applications, and any deposits for the crew or venue.
- Production: This is almost always the biggest chunk of the budget. It covers the day-of expenses like fees for the photographer, assistants, stylists, and models. It also includes gear and studio rentals, location fees, insurance, catering, and travel.
- Post-Production: Don't forget what happens after the shoot. You need to account for standard retouching, any complex editing, and fees for digital delivery or gallery hosting.
My most important piece of advice? Add a 10-15% contingency fund to your final number. This isn't just fluffy padding; it's a non-negotiable safety net for the unexpected costs that always pop up. Trust me, you'll be glad you have it when you need to cover an extra hour at the location or make a last-minute run for a prop.
This process—from budgeting to timeline to the final call sheet—is the administrative backbone of any successful shoot.
As you can see, a solid budget lays the foundation for a realistic timeline, and all of that critical information comes together in the call sheet.
What Absolutely Must Be on a Call Sheet?
Think of the call sheet as the bible for the shoot day. It’s the one document everyone on set will turn to, so it needs to be perfectly clear and have everything in one place. No exceptions.
Here are the absolute must-haves for every single call sheet:
- Project & Key Contacts: The name of the project and the main point person (usually the producer or photographer) with their cell number right at the top.
- Date & Weather: The shoot date, of course, but also a quick weather forecast so the crew knows whether to bring sunscreen or a rain jacket.
- All The Addresses: The address for the shoot location, where to park, and any other key spots. Including links to a map is a pro move.
- The Schedule: A detailed timeline with specific arrival times (call times) for every single person. It should also list hair and makeup start, first shot, lunch break, and the estimated wrap time.
- Crew & Cast List: Everyone's name, their role, and their contact number.
- Emergency Info: The address of the nearest hospital and an emergency contact for the production.
A detailed call sheet isn’t just about being organized; it shows your team you’re a professional and sets the tone for a smooth, efficient day.
At Candid Studios, we live and breathe this stuff. We know that meticulous planning is where incredible stories begin. Our award-winning team manages every single detail—from the first call to the final delivery—to make sure your vision comes to life exactly as you imagined it. Whether it's a wedding, a corporate event, or a commercial campaign, we blend artistry with flawless execution.
Let us help you capture your story. Find out more about our photography and videography services.