Voice Over Videos: Professional Creation Guide
Learning how to add a voice-over to your videos is a total game-changer. It’s what turns an amateur-looking clip into a professional story, injecting it with emotion, clarity, and a real personality. The whole process boils down to writing a great script, recording clean audio with a decent microphone, and then mixing it skillfully with your video.
This guide will walk you through every single step to get that polished, cinematic sound you're after.
Why a Great Voice-Over Changes Everything
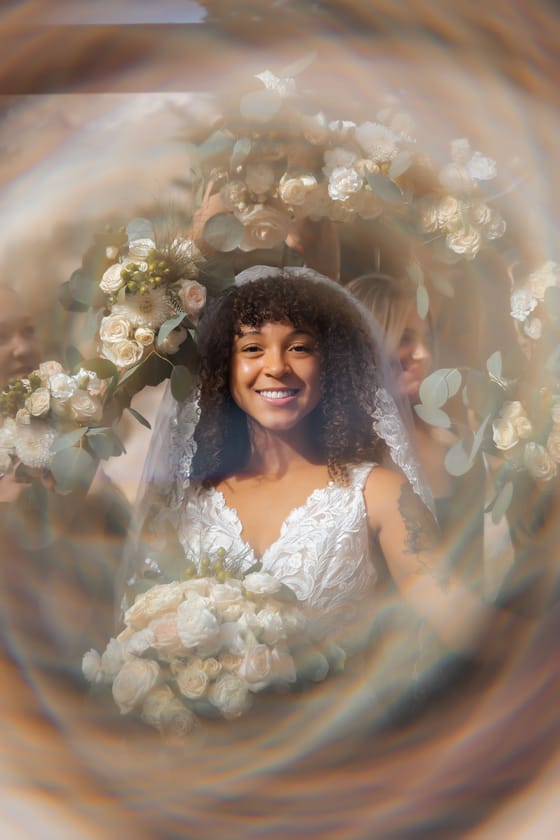
A compelling voice-over is often the one thing that separates a good video from an unforgettable one. It’s the secret sauce that transforms a wedding film into a beautiful story or a standard corporate video into a powerful, persuasive message.
A well-done voice-over is more than just narration; it's the emotional backbone of your video. It guides the viewer, adds layers of depth that visuals can't capture on their own, and ultimately builds a direct, personal connection with your audience.
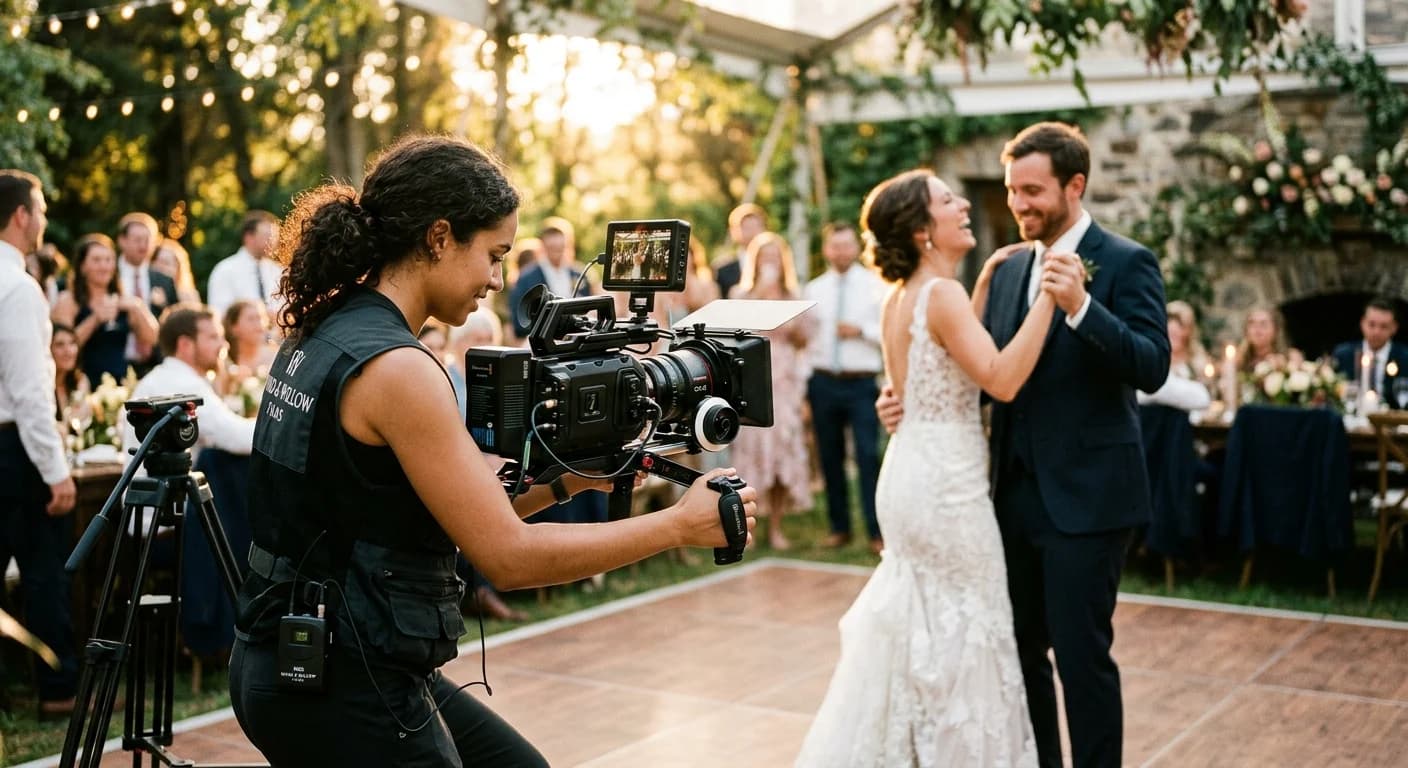
This human connection is precisely why professional voice work is still so critical. In just the last decade, it’s evolved from a niche post-production task into a core part of video strategy. As streaming and localized content have exploded, demand for polished voice-over and dubbing has grown right alongside it, becoming a core part of how brands and storytellers reach their audiences.
The Power of the Human Voice
The human voice has a unique ability to convey subtle shifts in tone, inflection, and pacing that AI voices just can't replicate yet. These little nuances are what make a story stick, whether it's the genuine warmth in a wedding narrative or the quiet confidence in a brand message. This is a big reason why our complete guide to brand video production puts such a heavy emphasis on storytelling.
The difference is clear in a few key areas:
- Emotional Resonance: A real voice can express authentic joy, seriousness, or excitement, making the content far more engaging.
- Authenticity and Trust: We're naturally wired to trust a human voice. It just feels more personal and credible.
- Narrative Control: A skilled narrator knows exactly when to speed up to build tension or slow down for dramatic emphasis, giving them total control over the story’s flow.
A voice-over isn't just about reading a script; it's about performing it. The goal is to make the audience feel something—to connect with the story on a deeper level.
Developing Your Vocal Craft
Mastering your voice is a skill, and like any skill, it takes practice. If you really want to elevate the impact of your voice-overs, dedicated vocal coaching can make a world of difference.
Professional guidance helps you sharpen your diction, control your breathing, and find the perfect tone for any project. In this guide, we’ll pull back the curtain on how the pros create such emotionally resonant audio, making high-quality results accessible to everyone. We'll get into the entire process, from scripting a natural-sounding narrative to mastering the final audio mix.
1. Plan, Write, and Practice Your Script
Before you even think about a microphone, let's talk about the most important part of any voice-over: the script. Great audio can't save a bad script, but a great script is the foundation for everything that follows. This is your roadmap.
Your goal is to write for the ear, not the eye. That means it needs to sound natural and conversational, not like you're reading an essay.
Writing a Script That Connects
Think about how people actually talk. We use shorter sentences and simpler language. As you're writing, read every line out loud. Does it feel clunky? Do you stumble over a certain phrase? If it feels weird to say, it will sound even weirder to your audience. Rework it until it flows smoothly.
You'll also want to learn how to write a compelling script for your videos that holds attention from the first word to the last.
The context of your video completely changes the scripting approach. A wedding film, for example, needs to be personal and emotional. We often pull lines directly from vows or letters to build an authentic story. On the other hand, for our video production for businesses, the script needs to be clear, confident, and persuasive. The story and tone must match the audience.
This whole process is about turning words on a page into an experience that feels real and engaging for the listener.
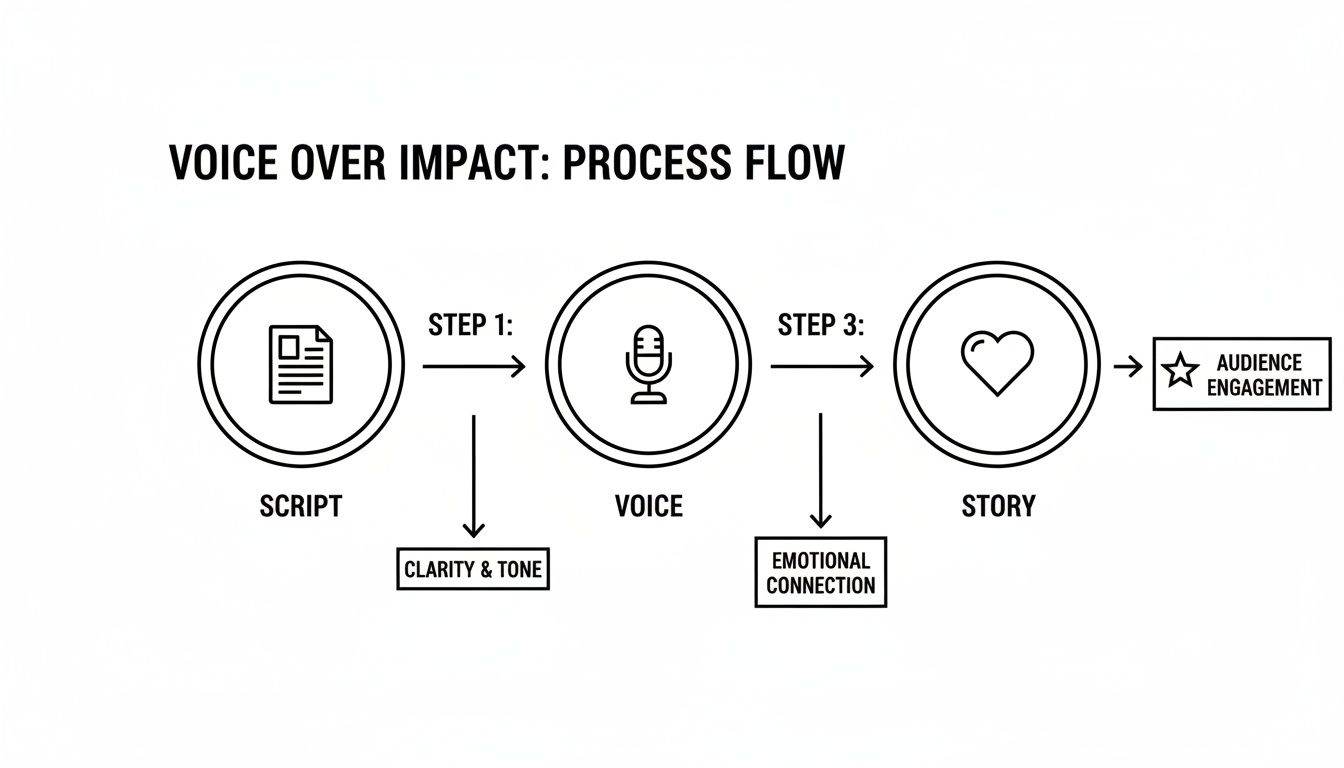
As you can see, every step builds on the one before it to create that final connection. The technology is just a tool; it's the human element that makes a voice-over truly resonate.
Choosing Your Microphone for Voice Overs
Once you have a solid script, it’s time to think about gear. Don't worry, you don't need to spend thousands on a professional mic, but the one built into your laptop or phone won’t cut it. Your microphone is the single most important piece of hardware for capturing clean, rich audio. Here’s a quick rundown of the most common types to help you decide.
Microphone Type
Best For
Pros
Cons
USB Condenser
Beginners, podcasters, YouTubers
Plug-and-play simplicity; great sound for the price.
Can be sensitive; may pick up background noise.
XLR Condenser
Serious amateurs, pro studios
Highest audio quality; excellent detail and clarity.
Requires an audio interface and more technical setup.
Dynamic
Noisy environments, live vocals
Excellent at rejecting background noise; very durable.
Less sensitive; can sound less crisp for voice-overs.
Lavalier ("Lav")
On-camera interviews, vlogging
Small and discreet; consistent sound as you move.
Can have a smaller, less rich sound; rustling clothes can be an issue.
For most people starting out, a good USB condenser microphone offers the best balance of quality, ease of use, and affordability. It's a massive step up from any built-in mic and will give you that professional sound you're after.
Taming Your Recording Space
Now for the secret weapon of great audio: your environment. A $1,000 microphone will sound terrible in a bad room. The two biggest audio killers are reverb (echo) and background noise. Hard surfaces like bare walls, wood floors, and windows are your enemy—they bounce sound waves all over the place, creating that hollow, amateur sound.
Your mission is to absorb those sound waves, and you can do it for free.
- Pick the right room. A small room is better than a large one. A walk-in closet is the gold standard for a reason: all the clothes act as natural sound dampeners. Seriously, it works wonders.
- Soften everything. If you don't have a dream closet, make one. Hang heavy blankets or duvets on the walls. Throw pillows and cushions in the corners. A thick rug on the floor makes a huge difference.
- Kill the noise. This sounds obvious, but it's easy to forget. Turn off the AC, the refrigerator, computer fans—anything that hums or buzzes. Close the windows and put your phone on silent.
Think of it as building a pillow fort. I once had a client record a surprisingly clean voice-over from inside his car parked in a quiet garage. The upholstered interior created a perfect, deadened space.
Get the script and the recording environment right, and you're already 90% of the way there. These two steps are far more important than the gear you use and will make the biggest impact on your final sound.
Recording Your Voice Over with Confidence
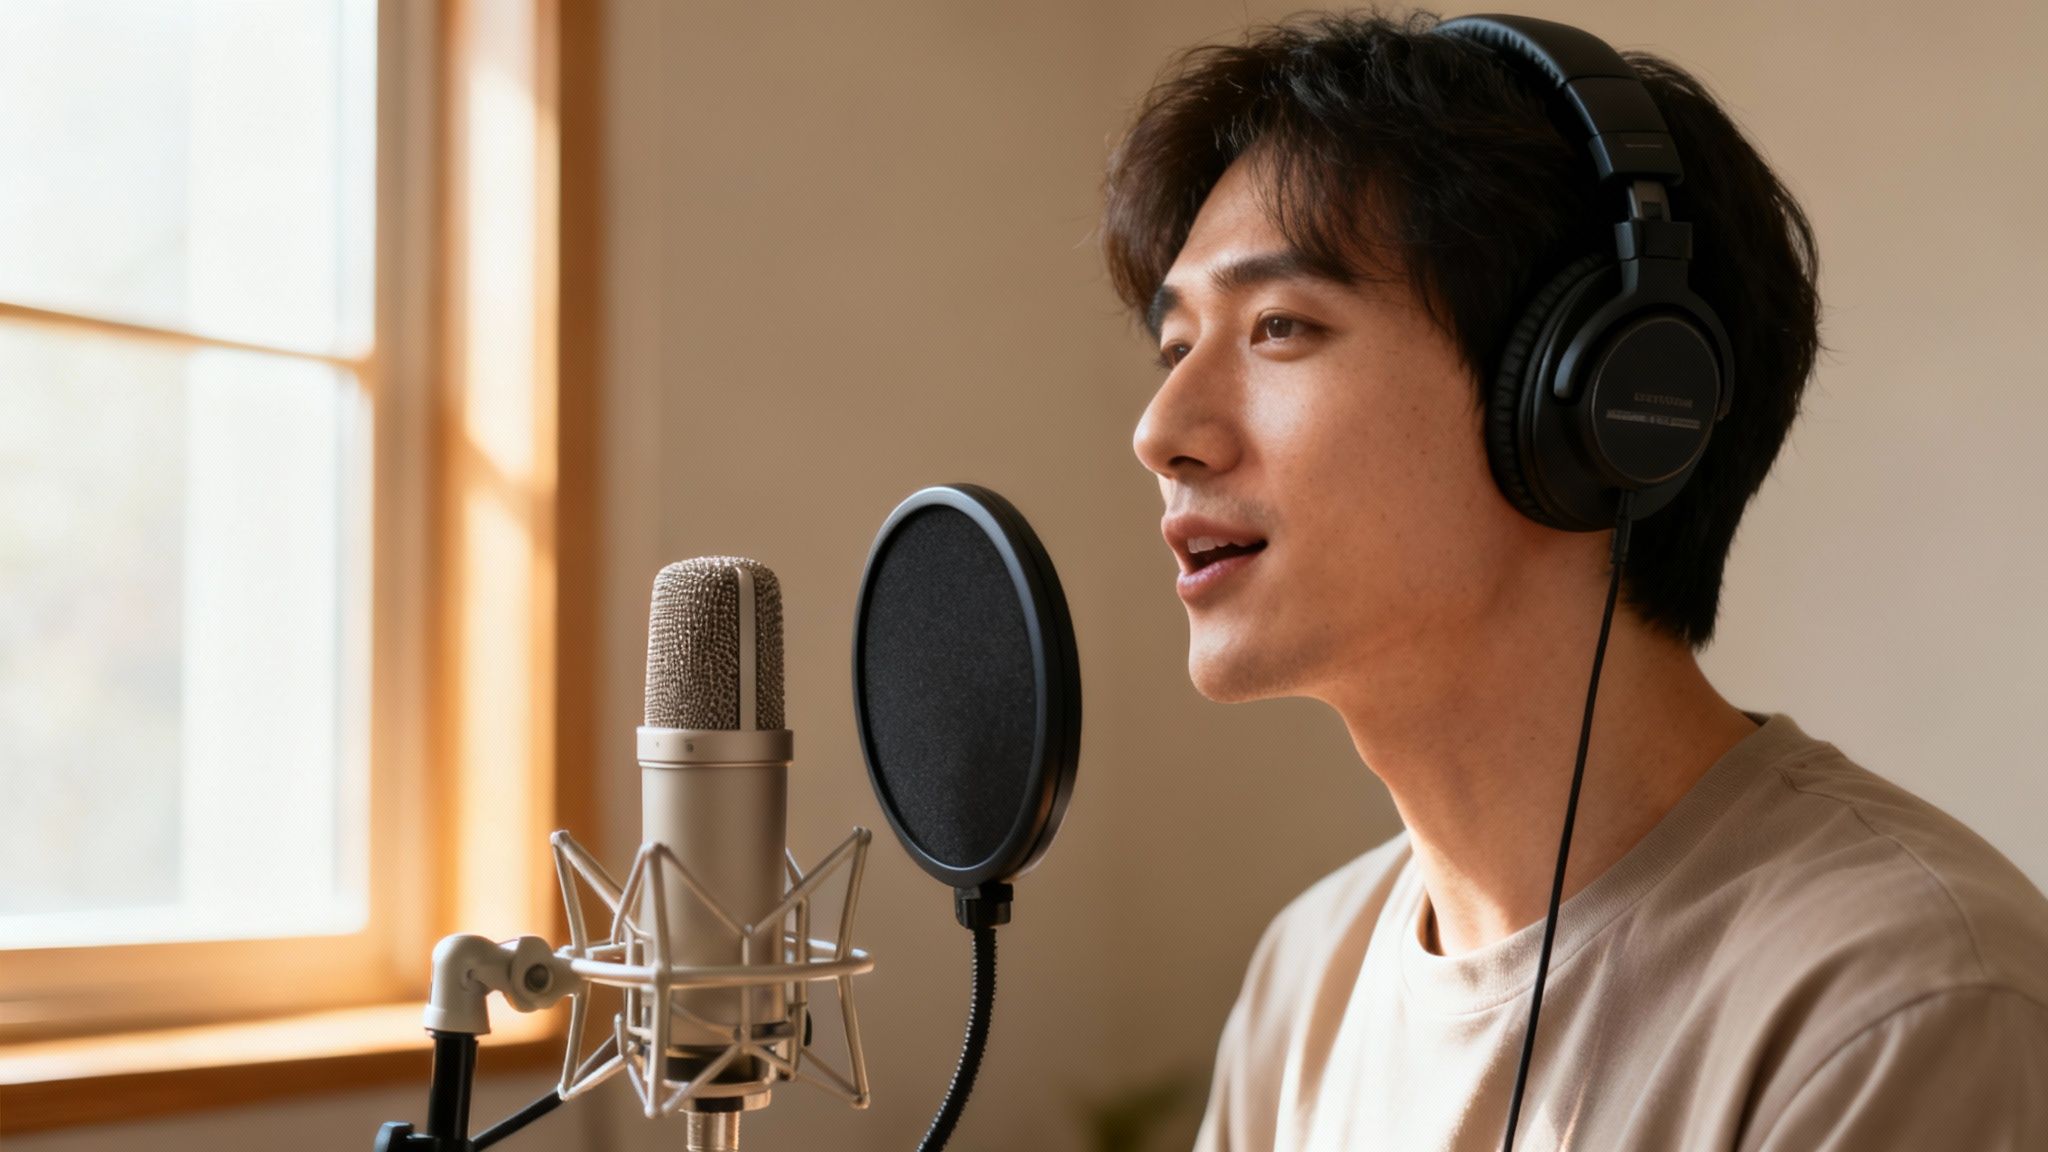
Alright, your script is polished and your recording space is prepped. Now for the fun part—turning those words on the page into a living, breathing performance. The goal here is simple: capture clean, clear audio that carries the emotional weight of your story.
To pull this off, we'll dive into two main areas: getting your recording software dialed in and mastering your vocal technique. Nailing these two things will save you a ton of headaches in the editing room and give your final video that polished, cinematic feel.
Setting Up Your Recording Software
You really don't need to break the bank on software to get incredible results. Free programs like Audacity are surprisingly powerful, and paid options like Adobe Audition just add more professional-grade tools. Whichever you choose, the core principles are exactly the same.
The single most critical setting to get right is your input level, sometimes called "gain." This is simply how loud your microphone's signal is.
If your recording level is too low, you'll hear a ton of hiss and background noise when you try to turn it up later. If it's too high, your audio will "clip" and distort—a harsh, crackling sound that is impossible to fix. Clipping is the absolute enemy of clean audio.
You're looking for that sweet spot. As you speak into the mic at a normal volume, keep an eye on the level meter in your software. You want the signal to consistently bounce between -12dB and -6dB. This leaves plenty of headroom to avoid distortion while making sure the recording is strong enough to work with.
Before you start for real, record a few lines from your script. Pop on your headphones and play it back. Does it sound clear? Any weird static or fuzz? Tweak the gain until you get a perfectly clean signal, and then lock it in—don't touch that knob again for the rest of the session.
Mastering Your Microphone Technique
How you speak into your microphone is just as crucial as which one you bought. Professional voice actors spend years refining this, but you can dramatically improve your sound with just a few small adjustments.
Proximity and Position
Your distance from the mic has a huge impact on your vocal tone.
- Too Close: This triggers the "proximity effect," making your voice sound overly bassy and boomy. It also amplifies every tiny mouth click and breath.
- Too Far: Your voice will sound thin and distant, with a noticeable echo as the mic starts picking up more of the room's natural reverb.
As a rule of thumb, start with a distance of about 6-8 inches from the microphone. Try to position yourself so you're speaking slightly to the side of the mic's capsule, not directly into it. This simple trick alone does wonders for reducing "plosives"—those harsh bursts of air from "p" and "b" sounds that can overload a microphone.
This is where a pop filter becomes your best friend. It’s an inexpensive screen that sits between you and the mic, diffusing those plosives for a much smoother, more professional sound.
Performing with Authenticity and Consistency
Remember, recording a voice-over is a performance. Your energy, pacing, and emotion are what will ultimately connect with your audience. For a wedding film, for example, let that genuine emotion come through. Don't be afraid to let a smile or a touch of sentiment shine in your voice.
If you’re tackling a longer script, consistency is everything. Mark up your script with notes on where to pause or what tone to use. I also recommend recording a short "anchor phrase" at the start of your session. If you have to take a break, you can listen back to that phrase to perfectly match your energy and tone when you pick back up.
Here are a few more tips to help you deliver a confident performance:
- Stay Hydrated: Keep room-temperature water handy. Try to avoid dairy, caffeine, or sugary drinks right before recording, as they can affect your vocal cords.
- Warm-Up: Just like an athlete, your voice needs a warm-up. A few simple vocal exercises like humming, lip trills, or even just reading a page from a book out loud can make a world of difference.
- Stand Up: Recording while standing opens up your diaphragm. This gives you better breath control and leads to a more resonant, confident delivery.
- Record in Chunks: Don't try to power through a 10-minute script in a single take. Break it down into paragraphs or sections. This keeps your energy high and makes editing so much easier.
Ultimately, the quality of your audio is deeply tied to your visual storytelling. Just as you’d research the best video cameras for videography and filmmaking to get stunning shots, investing time in your audio technique will elevate the entire production. Confident recording is what turns a good script into an unforgettable video.
Editing and Mixing Your Audio Like a Professional
A clean recording is just the starting point. The real magic happens in the editing suite, where you take that raw audio and polish it into a professional voice-over. This isn't about fixing huge mistakes; it's about enhancing what’s already there to make your voice clear, consistent, and emotionally engaging.
Think of it like developing film. You've captured the potential in the initial recording, but it’s the fine-tuning in post-production that truly brings the final product to life. Let’s walk through the essential steps to clean, shape, and balance your audio for a flawless result.
Cleaning Up Your Raw Audio
First things first, you need to perform a surgical cleanup of the raw recording. The goal here is to get rid of any distracting background noises or flubs without making your voice sound processed or unnatural.
Throw on a good pair of headphones and listen to the entire track from start to finish. Your ears are your most important tool at this stage. Listen for anything that pulls you out of the moment—a distant dog bark, a loud breath, a little cough between sentences.
Here’s a practical checklist for your first pass:
- Snip Out Mistakes: This is the obvious one. Find any stumbles, repeated words, or false starts and simply delete them. The beauty of digital audio is you can stitch together the best parts of different takes into one seamless performance.
- Tame the Gaps: Cut out any distracting noises in the pauses between sentences. But be careful! Don't remove the natural breaths entirely, or the narration will sound robotic and a little creepy. A better approach is to just lower their volume so they aren't distracting.
- De-Click and De-Ess: Most audio software has tools to soften those sharp "s" sounds (sibilance) and get rid of any subtle mouth clicks. These plugins are lifesavers and can make your audio sound infinitely more professional.
The secret to great audio editing is being invisible. Your audience should never even suspect the audio was edited. The best work feels completely natural and effortless to listen to.
Shaping Your Vocal Tone with EQ
With a clean track, you can now start shaping its tonal character with an Equalizer (EQ). An EQ lets you boost or cut specific frequencies, kind of like the bass and treble knobs on an old stereo. For voice-overs, the goal is to improve clarity and remove any muddy or harsh-sounding frequencies.
Most of the magic in a human voice happens in the midrange. A small, gentle boost somewhere around 2-5 kHz can add a ton of presence and make your voice really cut through any background music.
You can also use an EQ as a problem-solver:
- Got Boominess? If your recording sounds too deep or bass-heavy, try making a small cut in the 100-250 Hz range.
- Sounds Nasally? That tinny, "talking-through-your-nose" sound can often be fixed by dipping the frequencies between 800 Hz and 1.5 kHz.
Always start with small adjustments. A little bit of EQ goes a very long way.
Creating Consistent Volume with Compression
Ever wonder how professional narrators maintain such an even, consistent volume? They never get too quiet or suddenly too loud. That smooth, balanced sound is achieved using a tool called a Compressor.
A compressor works by automatically turning down the loudest parts of your recording and boosting the quietest parts. This reduces the overall dynamic range and gives you that polished, radio-ready sound that's easy on the ears.
When you're setting it up, start with a gentle ratio, something like 2:1 or 3:1. This will even things out without completely squashing the natural dynamics of your voice. Proper compression is what makes your voice-over sit perfectly in the final mix.
This is more important than ever, as demand for corporate video keeps climbing. With so many companies now using video for key communications, clear audio is no longer a luxury. It's a necessity.
Syncing Audio to Video and Adding Music
Now for the final piece of the puzzle: bringing it all together. Import your polished voice-over track into your video editor and start lining it up with the visuals. This is the syncing process, and it’s where your story really comes alive. Watch it back over and over, nudging the audio clip until the narration perfectly matches the action on screen.
Once the voice is locked in, you can start layering in background music and sound effects. The golden rule here is balance—your voice must always be the star. A good rule of thumb is to lower the music volume by about -18 to -24 dB anytime someone is speaking. This technique, called "ducking," ensures your narration stays front and center.
If you're weaving your voice-over into a photo-based story, be sure to check out our complete guide on how to create a photo slideshow for more tips on making visuals and audio work together.
Common Voice Over Mistakes and How to Avoid Them
You can have the best microphone in the world and a script that’s pure gold, but a few simple, common mistakes can make the whole thing sound amateur. Getting this last part right is what separates the pros from everyone else. The good news? Once you know what to listen for, these issues are surprisingly easy to sidestep.
Let's walk through some of the most common tripwires I see and, more importantly, how to fix them so your audio always sounds polished and professional.
Taming Technical Audio Glitches
Technical flubs are often the most obvious. They immediately pull your listener out of the experience and can make your whole production feel cheap. Thankfully, they’re usually just a simple oversight.
One of the biggest culprits? Plosives. That’s the annoying, thumpy sound you get when a burst of air from "p" or "b" sounds slams into the microphone. A pop filter is your first line of defense here, but if those pops still sneak through, try angling your mouth slightly to the side of the mic instead of speaking directly into it.
Distracting mouth noises—those little clicks and smacks—are another classic problem. The simplest fix is to stay hydrated with room-temperature water. If some clicks still make it into the recording, you can hunt them down in your editor. Just zoom way in on the waveform, find the tiny spike, and silence it.
Your goal is to create an effortless listening experience. The less your audience notices the technical quality of the audio, the more they can focus on the message and emotion of your content.
Fixing Environmental and Acoustic Problems
Your recording space is just as important as your microphone. A world-class mic in a bad room will always sound bad. Period.
The number one enemy here is reverb, that hollow, echoey sound. It’s caused by your voice bouncing off hard, flat surfaces like bare walls, ceilings, and windows. If your recording sounds like it was made in a tiled bathroom, you’ve got a reverb issue. The solution is absorption. You don’t need a pro studio; just surround your recording area with soft things like blankets, pillows, or even a closet full of clothes.
Then there’s background noise. The low hum of an air conditioner, traffic outside, or a distant dog barking can ruin a perfect take. While noise reduction plugins can help a little, they can also hurt your audio quality. Prevention is always better. Before you hit record on your script, always record 30 seconds of pure silence. This "room tone" test will reveal every little sound your mic is really picking up.
Overcoming Performance Hurdles
Great sound quality doesn't matter much if the delivery is flat. Performance mistakes are more subtle, but they can be just as jarring to the listener.
A monotonous, robotic delivery is a dead giveaway of an amateur. It usually happens when you’re nervous or just reading words off a page without connecting with them. To beat this, practice reading your script out loud like you’re explaining it to a friend. Make notes on where to add emphasis. And seriously, smile while you talk—it genuinely changes your tone and makes you sound more engaging.
Another common pitfall is rushing. When you speak too quickly, your message gets lost, and all the emotional weight evaporates. Slow down. Take a breath. Use natural pauses to give your key points a moment to sink in. If you struggle with pacing, go through your script and physically mark places where you need to pause and take a beat.
Even with the rise of AI voices, producers still overwhelmingly prefer authentic human narration. An industry survey revealed more than half of companies plan to use real human voice actors for brand marketing in 2025, with similar numbers for ads and animation. Your unique performance is what makes your content connect. You can find more insights by reading about the future of voice acting at Gravyforthebrain.com.
When something just doesn't sound right, it's easy to get frustrated. I've put together this quick troubleshooting guide to help you pinpoint the issue and fix it fast. Think of it as a first-aid kit for your audio.
Voice Over Troubleshooting Guide
| Problem | Common Cause | Quick Fix |
|---|---|---|
| Popping "P" & "B" Sounds | Plosives; air hitting the mic capsule directly. | Use a pop filter. Speak slightly off-axis (to the side of) the microphone. |
| Hollow, Echoey Audio | Reverb from sound bouncing off hard surfaces. | Record in a smaller, softer space. Use blankets, pillows, or acoustic panels to absorb sound. |
| Distracting Mouth Clicks | Dry mouth or poor mic technique. | Stay hydrated with water. Edit out individual clicks by silencing them on the waveform. |
| Low-Level Hum or Buzz | Background noise (A/C, computer fan) or a bad cable. | Turn off all noisy appliances. Check your cable connections or try a different one. |
| Volume is Too Loud/Distorted | Recording levels are set too high ("clipping"). | Lower the gain/input level on your interface or mic so peaks hit between -12dB and -6dB. |
| Delivery Sounds Flat/Robotic | Reading the script without emotion or connection. | Practice reading it conversationally. Mark up the script for emphasis and smile while you speak. |
Going through this checklist can solve the vast majority of common audio problems. It’s all about developing an ear for these things and building good habits from the start.
Frequently Asked Questions About Voice Overs
As you start getting your hands dirty with voice-overs, the practical questions always seem to pop up. It's one thing to read about recording theory, but it’s another thing entirely when you’re actually trying to make it work. Let's tackle some of the most common questions we get from creators just like you.
We'll clear up everything from the best free tools to get you started to the nagging question of how long your script should actually be. Think of this as the "I wish I'd known that" section that'll help you move forward with a lot more confidence.
What Is the Best Free Software for Voice Overs?
Good news: you don't need to drop a ton of cash on software to get pro-level audio. In fact, one of the most powerful and widely-used tools in the audio world is completely free.
Audacity is the undisputed king here, especially for beginners (and even plenty of seasoned pros). It's an open-source audio editor that works on Mac, Windows, and Linux, giving you all the core tools you need to record, edit, clean up noise, and polish your audio.
- What's great about it? It costs nothing, has a huge community for support, and covers all the fundamentals for great voice-over work.
- What's the catch? The interface can feel a bit dated, and it doesn't have the slick, advanced workflows you’d find in paid software like Adobe Audition.
While Audacity is a fantastic place to start, don't forget that many video editing programs have surprisingly good audio tools built right in. For example, DaVinci Resolve (which has a super-powerful free version) includes Fairlight, a full-blown audio post-production suite. It's another excellent no-cost option.
How Long Should My Voice Over Script Be?
One of the most common mistakes I see is a script that's way too long for the video. This forces you into a corner where you either have to talk at a frantic, unnatural pace or start hacking away at your carefully edited video. A simple rule of thumb can save you a world of pain.
For most English-speaking audiences, a comfortable, conversational pace is around 150 words per minute (WPM). This is the sweet spot where people can easily follow along without feeling rushed.
To figure out your target word count, just use this simple formula:
(Video Length in Minutes) x 150 = Target Word Count
So, for a 3-minute video, you'd want to aim for a script right around 450 words. Of course, this isn't set in stone. A high-energy marketing video might push closer to 160 WPM, while a slower, more emotional piece could feel better around 130 WPM. The best way to know for sure? Read your script out loud with a timer. It’s the only way to get a real feel for your personal pacing.
Can I Record a Good Voice Over with My Phone?
This question comes up all the time, and the answer is a solid "maybe." Your smartphone has a surprisingly decent microphone, but let's be real—it wasn't designed for professional voice capture. The built-in mic is omnidirectional, meaning it hears everything—the echo in your room, the hum of your fridge, you name it.
But if it's all you have, you can absolutely get usable results by making a few smart moves:
- Find a "dead" space: Your best bet is a walk-in closet full of clothes. The soft surfaces will absorb sound and kill the echo. A small room piled with blankets and pillows works too.
- Get an external mic: This is the biggest game-changer. A small, affordable lavalier or condenser mic that plugs into your phone will give you a massive jump in quality.
- Watch your distance: Don't hold the phone right up to your mouth. Keep it about 6-8 inches away and a little to the side. This simple trick helps you avoid those harsh "p" and "b" sounds called plosives.
While a dedicated USB microphone is always going to be better, a phone can definitely work in a pinch if you take the time to control your environment. If you have more questions about specific gear or techniques, you might find answers in our comprehensive FAQ page.
How Do I Balance Music and Voice Over?
Getting the mix between your voice and a background music track right is what separates amateur videos from polished, professional ones. The key is simple: the voice is always the star of the show. Music should support the story, not fight it for attention.
The golden rule of mixing is clarity. If the viewer has to strain to understand what's being said, the music is too loud. Your voice over must always remain front and center.
The professional technique for this is called "ducking." This is where you automatically lower the music volume the moment the narration starts. Pretty much any video editing software has a tool for this, usually tucked away in the audio effects panel.
As a starting point, try lowering your music by about -18dB to -24dB relative to your voice-over level. This carves out just enough space for your voice to be perfectly clear while still letting the music add that emotional punch without being distracting.
At Candid Studios, we believe that creating a powerful video is about mastering both the visuals and the audio. From scripting to the final mix, our team is dedicated to telling stories that resonate. Visit us to see how we can bring your vision to life.