Best Foundation for Photography & Flash | Candid Studios

The secret to finding the best foundation for pictures isn't about chasing a single "holy grail" product. It's about understanding what makes a foundation work with a camera's lens, not against it. The real magic lies in choosing formulas with a natural or satin finish, steering clear of ingredients that cause flashback (like high-SPF Titanium Dioxide), and, of course, nailing your undertone match.
Your Guide to a Flawless Photo Finish
Have you ever done your makeup, loved what you saw in the bathroom mirror, and then cringed at the photos later? That ghostly white cast, the weird texture you didn't see before—it’s a painfully common experience.
It happens because cameras see makeup very differently than our eyes do. What looks perfectly blended in person can suddenly appear heavy, chalky, or completely the wrong color under the harsh truth of a camera flash or a high-definition lens.
This guide will take the mystery out of finding a photo-ready foundation. We're going to skip the brand hype and get down to the science of what actually works on camera. We'll break down the key features that will give you a flawless finish, every single time.
This know-how is more important than ever. The global makeup foundation market is growing fast, with strong demand expected to continue for years to come. This boom is fueled by people wanting specific things in their makeup, like natural ingredients and SPF—features that directly affect how a foundation performs in photos.
Key Concepts for Camera-Ready Foundation
To get that perfect photo finish, you have to start thinking a bit like a photographer. It all comes down to controlling how light interacts with your skin.
Here are the core ideas we're about to unpack:
- Understanding "Flashback": We'll get into why certain ingredients (especially in sunscreen) bounce a camera's flash right back, creating that dreaded white glow, and how to avoid it.
- The Importance of Finish: You’ll see why super dewy or flat matte foundations can be tricky on camera and why a natural, satin finish is almost always your safest bet.
- Perfecting Coverage and Texture: We'll cover how to get an even, flawless-looking complexion without it looking like you're wearing a mask.
- Nailing Your Undertone: For photos, a perfect color match is non-negotiable. It’s the key to not looking ashy or orange.
The real goal is to find a foundation that just looks like your skin, but better—both in person and on camera. It’s about creating a smooth, even canvas that lets your features be the star of the show.
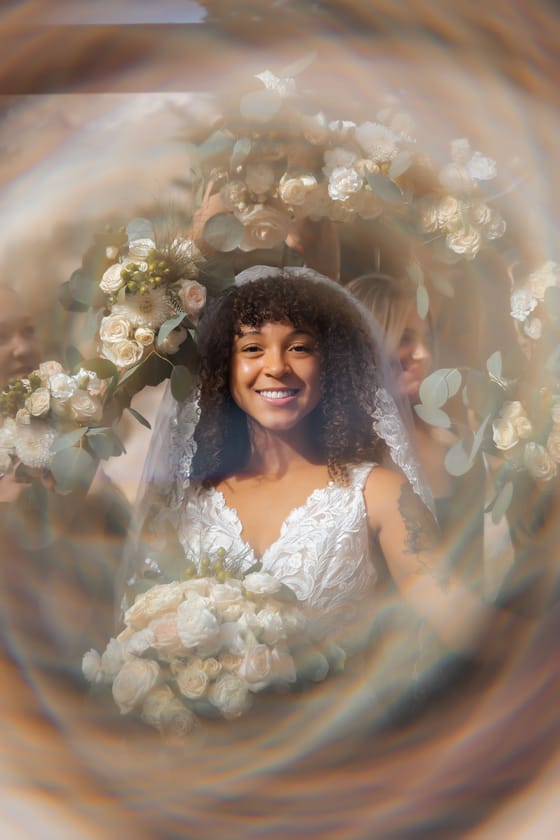
Whether you’re a bride getting ready for your big day, prepping for a corporate event, or just updating your headshots, this is essential stuff. Mastering these fundamentals is a huge step in learning how to prepare for professional headshots and making sure you look and feel your best.
How Cameras Really See Your Foundation
To find a foundation that photographs beautifully, you have to think about one thing: light. Makeup that looks absolutely perfect in your bathroom mirror can suddenly look jarring and unnatural through a camera lens, especially when a flash goes off. It’s not you—it’s just the science of how certain makeup ingredients react to a sudden, intense burst of light.
Imagine your foundation is made up of countless microscopic particles. Some of these are designed to absorb light, which gives you that smooth, even-toned look we all want. Others, however, are designed to reflect it. And that’s where the problems start.
The Science of Photographic Flashback
The number one photo-killer is photographic flashback. We’ve all seen it: that ghostly, chalky white cast that appears on someone's face in a flash photo, making them look several shades lighter than their neck. This happens because some ingredients are highly reflective.
So, who are the main offenders? They’re usually the same ingredients found in foundations with SPF.
- Titanium Dioxide: This mineral is a powerful, bright white pigment. It's fantastic at scattering light, which is exactly why it’s so good at blocking UV rays. But when a camera flash hits it, that light scatters right back into the lens, creating that bright, washed-out look.
- Zinc Oxide: Just like titanium dioxide, zinc oxide is another physical sunscreen that sits on top of your skin and reflects light away. Amazing for sun protection, but a disaster for flash photography.
Silica is another ingredient to keep an eye on. While super finely milled HD silica powders can create a gorgeous, soft-focus blur, heavier versions can also bounce light right back at the camera, adding to that unwanted white glow.
Key Takeaway: For any event with flash photography—think weddings, red carpet events, or even just a night out—your safest bet is to choose a foundation without SPF. The very things that shield you from the sun are the same things that will sabotage your pictures.
HD Cameras and Why Texture Is Everything
Flashback isn’t the only hurdle. With the incredible clarity of today's HD and 4K cameras, every single detail on your skin is magnified. This is both a blessing and a curse. While these cameras capture stunningly crisp images, they also put any and all makeup texture under a microscope.
A thick, heavy foundation that might look fine from a few feet away can suddenly appear cakey and mask-like on a high-definition screen. The camera will mercilessly pick up on things like:
- Uneven Blending: Streaks and patches you didn't even know were there can become glaringly obvious.
- Product Buildup: Foundation that has settled into fine lines, pores, or around the nose is put on full display.
- The Wrong Texture: A formula that’s too dry can highlight flaky patches, while one that’s too dewy can quickly look greasy under bright lights.
This is exactly why so many modern, photo-friendly foundations are all about achieving a "skin-like" finish. The goal isn't just to cover, but to do so without adding any visible texture. You want a smooth canvas that looks like naturally flawless skin, not a heavy layer of makeup.
Of course, the product is only half the battle. How it looks is also hugely dependent on the lighting. For anyone wanting to truly master their on-camera look, exploring a professional portrait photography lighting setup is a great way to understand how light sculpts the face and interacts with makeup.
Ultimately, the best foundation for pictures is one that works with the camera, not against it. It needs to absorb light properly, have a texture that melts into the skin, and provide coverage that perfects without concealing your natural beauty. Once you grasp these basics, you can pick a product with confidence, knowing you’ll look just as amazing on camera as you do in person.
Choosing Your Ideal Photo-Ready Foundation
Now that we understand how cameras see makeup, let's get practical. Walking down the cosmetics aisle can be overwhelming, but it gets a lot easier when you know exactly what to look for. The secret to a foundation that looks amazing on camera boils down to three key things: its finish, its coverage, and its undertone.
The hunt for that perfect bottle is a huge deal in the beauty world. It’s no surprise that the foundation cream market is projected to grow substantially over the coming years. That kind of growth shows just how much we all want products that really work. You can dig into the numbers yourself in the foundation cream research from 360iResearch.
Finding the Perfect Finish
A foundation's "finish" is simply how it looks once it has set on your skin—is it shiny, flat, or somewhere in the middle? For photography, the finish is everything because it controls how light bounces off your face.
-
Matte Finish: A totally matte foundation absorbs light. This is great for keeping oiliness in check, but under studio lights, it can make skin look flat, dry, or even a bit older. It just doesn't have the dimension of real skin.
-
Dewy Finish: On the other end, a dewy or luminous foundation reflects a ton of light, giving you that healthy, youthful glow. The danger? Camera flashes and bright lights can turn that "dewy" glow into a "greasy" shine in a hot second, creating harsh hotspots and highlighting every bit of texture.
-
Satin Finish: This is the sweet spot. A satin or "natural" finish is the perfect middle ground—not too matte, not too shiny. It mimics how healthy skin naturally reflects light, creating a beautiful soft-focus effect that looks incredible on camera. It’s the safest and most reliable choice for almost any photoshoot.
Choosing the right finish can make or break your photos. To help you decide, here’s a quick breakdown of how each one typically behaves under the lens.
How Foundation Finishes Perform on Camera
This table compares how different foundation finishes typically perform under various photographic lighting conditions, helping you choose the best option for your needs.
Finish Type
Best For
Potential Camera Pitfall
Pro Photography Tip
Matte
Oily skin; humid conditions; studio lighting
Can look flat, dry, or "cakey"
Use a luminous primer underneath or targeted highlighter to add back dimension.
Satin
All skin types; most lighting scenarios
Can show shine in the T-zone after several hours
Keep a translucent setting powder on hand for quick touch-ups on oily areas.
Dewy
Dry or mature skin; natural light photography
Can look greasy or oily under flash or harsh light
Apply only to high points of the face (cheekbones, bridge of nose) and use a matte formula elsewhere.
Ultimately, a satin finish offers the most versatility and reliability for photography, but knowing how to work with matte and dewy formulas gives you complete creative control.
Calibrating Your Coverage Level
Next up is coverage—how much of your skin the foundation actually hides. The goal is to even out your skin tone without creating a heavy, unnatural mask. High-definition cameras are incredibly sharp and will pick up on any foundation that looks thick or pasty.
Your best bet for photos is a buildable formula. This lets you start with a sheer layer all over and then add a little more just where you need it, like over redness or a blemish. This approach keeps your skin looking like real, perfected skin, not like it's been painted over.
The point isn't to erase your face; it's to make your skin look its absolute best. A foundation you can layer strategically is key because it lets some of your natural skin show through, which looks far more believable on camera.
Remember, your makeup is just one piece of the puzzle. Making sure it works with your wardrobe is crucial for pulling the whole look together. For some great ideas on that, take a look at our guide on what to wear for your photoshoot.
Why an Exact Undertone Match Is Non-Negotiable
This one is critical. While you might be able to get away with a foundation that’s a little off in everyday life, a camera lens will call you out on it immediately. If your face doesn't match your neck and chest, it will be glaringly obvious in photos.
An undertone mismatch usually creates two big problems on camera:
- Looking Ashy: This happens when a foundation is too cool or pink for your warm, golden, or olive skin. It can make you look grey and washed out.
- Looking Orange: The opposite problem. When a foundation is too warm or yellow for your cool-toned skin, it can look strangely orange or muddy.
The only way to be sure is to test foundation shades on your jawline and, most importantly, check them in natural daylight. This guarantees the color blends seamlessly from your face to your neck, giving you a flawless look that holds up under any light.
This simple infographic breaks down when you should skip SPF in your foundation to avoid that ghostly white cast known as "flashback."
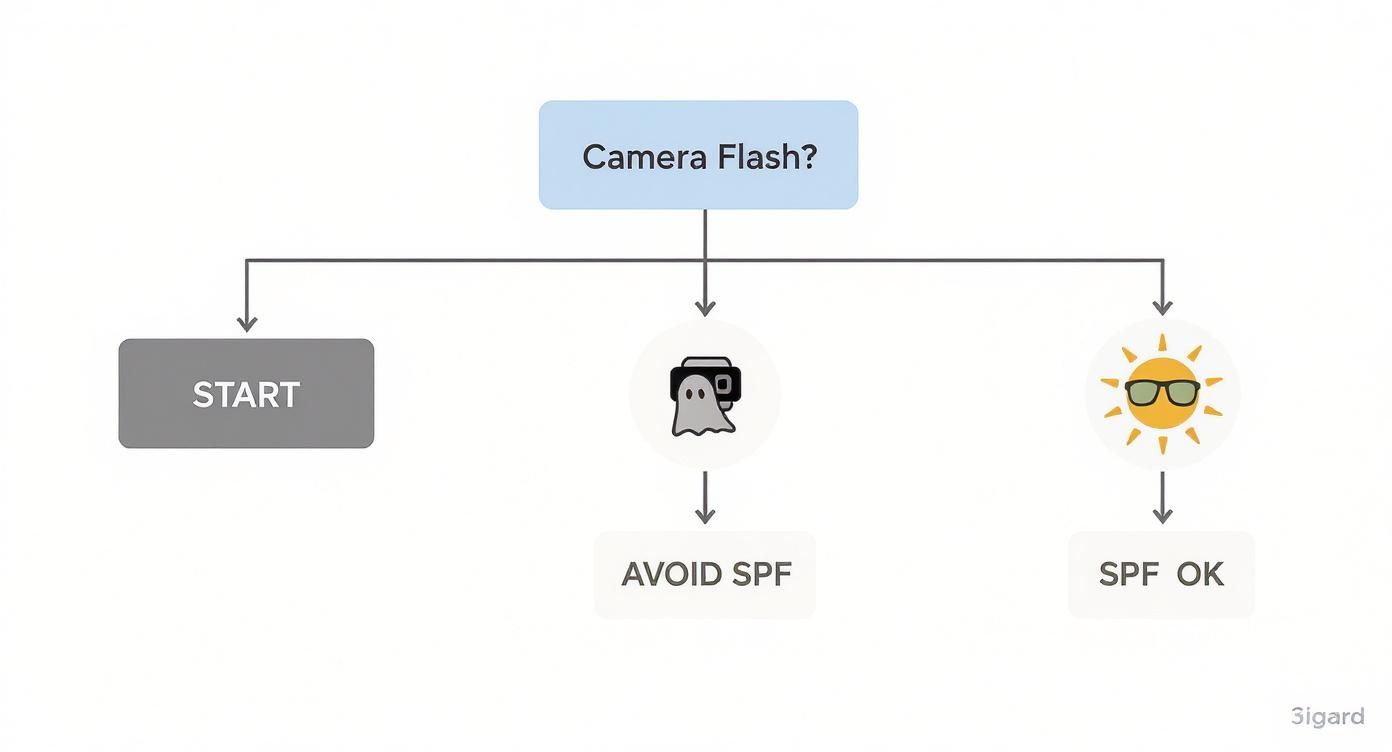
As you can see, the rule is pretty clear: if there's even a small chance you'll be photographed with a flash, an SPF-free foundation is your safest bet for a perfect picture.
Prepping Your Skin for a Perfect Canvas
You can have the most expensive, highly-rated foundation in the world, but it won’t do its job on skin that isn’t ready for it. Think of your skin like an artist's canvas. If it’s rough, uneven, or parched, the paint—your foundation—is going to look patchy and just… off. When you’re in front of a camera, where every little detail gets magnified, this prep work is your insurance policy for a flawless look.
A high-definition camera lens is unforgiving. It will call out every dry patch, highlight unwanted texture, and broadcast where foundation has settled into dehydrated fine lines. A great skin prep routine is what helps foundation glide on smoothly, stick where it's supposed to, and look like a second skin instead of a heavy mask.
The good news? It doesn’t have to be a complicated, 10-step affair. The focus is on a few core pillars that directly impact how your makeup looks and photographs.
The Foundation of Your Foundation Routine
Before a single drop of makeup touches your skin, a few key steps can completely change the game. This routine is all about smoothing, plumping, and priming your skin so the application is seamless and the finish lasts.
-
Gentle Exfoliation: Start by sloughing off any dead skin cells that create texture. A mild chemical exfoliant (think glycolic or lactic acid) used the night before is often a much better bet than a harsh physical scrub, which can leave you red and irritated. This simple step stops foundation from clinging to flaky patches.
-
Intense Hydration: Dehydrated skin is foundation's number one enemy. It will literally drink the moisture right out of your makeup, leaving behind a cakey, pigmented mess. Slather on a hydrating serum with ingredients like hyaluronic acid, then lock it in with a moisturizer that works for your skin type. This plumps up the skin from within, creating a smooth, supple surface.
-
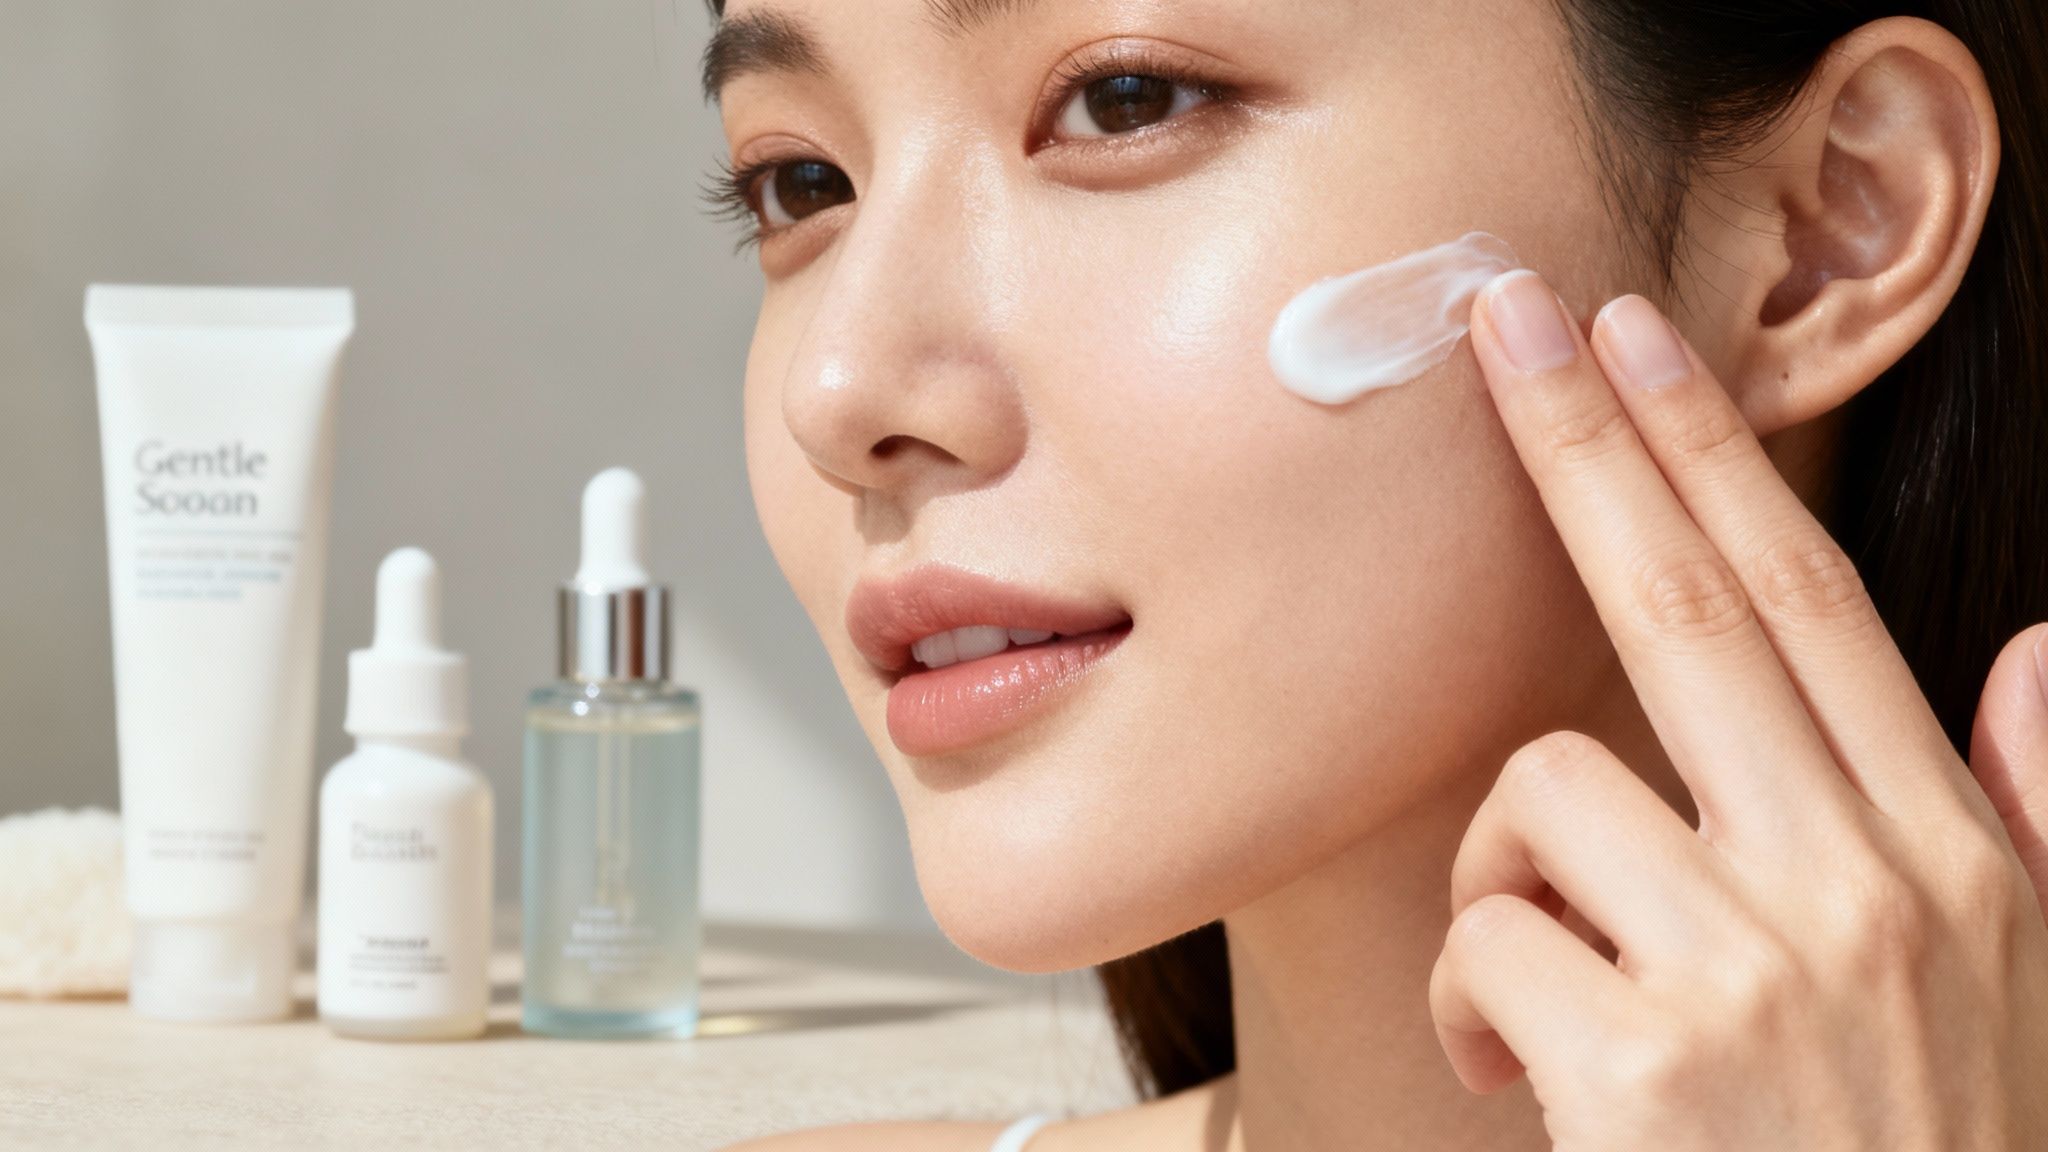
Strategic Priming: A primer is the all-important bridge between your skincare and your makeup. It creates a velvety base that helps foundation last longer while tackling specific concerns—like pores or shine—that photos love to emphasize.
Properly prepped skin requires less foundation to achieve a perfected look. When your canvas is smooth and hydrated, a little product goes a long way, preventing the heavy, mask-like appearance that cameras often capture.
Choosing the Right Primer for Your Photoshoot
Not all primers are created equal, and the right one for you comes down to what your skin needs. A well-chosen primer can single-handedly solve some of the most common issues that pop up in photos.
For those wanting to take their skin's readiness to the next level, professional services can make a huge difference. To get your skin perfectly primed and hydrated for a flawless foundation application, consider adding regular HydraFacial treatments to your routine.
Here’s a quick guide to picking the perfect primer:
- Pore-Filling Primers: These usually have a silicone base that acts like spackle for your skin, creating a super-smooth surface over enlarged pores for your foundation to sit on.
- Mattifying Primers: An absolute must if you have oily skin. A mattifying primer will absorb excess oil and keep you from looking greasy under hot studio lights.
- Hydrating Primers: If you have dry skin, this type of primer adds an extra layer of moisture, preventing foundation from settling into dry spots or fine lines as the day goes on.
- Illuminating Primers: Use these with a light hand! They can create a gorgeous “lit-from-within” glow, but they should only be applied to the high points of your face. Otherwise, you risk looking shiny all over.
Ultimately, this preparation is a key part of the entire process. To see how skincare fits into the bigger picture, check out our comprehensive guide on how to prepare for a photoshoot for more tips.
Mastering Application for a Seamless Finish

You can have the best foundation in the world, but if the application is off, it just won't look right on camera. With your skin prepped and your product chosen, this is where the real magic happens. The goal isn't just to cover things up; it's to create a flawless finish that looks like incredible skin, not a layer of makeup.
I've seen it time and again: the secret isn't a single, thick coat. That's a one-way ticket to a flat, mask-like look that cameras love to exaggerate. Instead, professional artists think of it as a delicate process, building up coverage in whisper-thin layers only where needed. It’s more like airbrushing than painting.
This approach keeps your skin’s natural dimension from getting lost, resulting in a perfected-yet-believable complexion that stands up to any lens.
Choosing Your Application Tools
How you put your foundation on completely changes the final result. Your brushes, sponges, and even your fingers each create a different texture and level of coverage. Knowing which one to grab for the job is a huge part of getting that flawless on-camera look.
-
Foundation Brushes: If you need to build coverage, a densely packed brush is your best friend. Think flat-top kabukis or domed buffing brushes. They're fantastic for working the product into the skin for that polished, airbrushed effect you want for big events. The trick is to use a mix of stippling (patting) and gentle circular motions to avoid any tell-tale streaks.
-
Damp Makeup Sponges: For a truly natural, skin-like finish, nothing beats a damp beauty sponge. It sheers out the foundation just enough and presses it into the skin, so it doesn't just sit on the surface. This is my go-to for building light, undetectable layers and getting a seamless blend with almost no visible texture.
-
Fingers: Don't write off your own hands! The natural warmth from your fingertips helps melt liquid and cream foundations, making them blend beautifully. This is a great technique for sheer-coverage formulas when you just want to even things out and look as natural as possible.
There's no single "right" tool—it's all about the effect you're after. For serious coverage, grab a brush. But for that seamless, melts-into-your-skin look that photographs like a dream, a damp sponge is almost always the winner.
The Art of Layering and Blending
The number one mistake I see is people going in with way too much product at once. When it comes to photography, it's always better to start with a sheer layer and build up coverage only where you actually need it. This targeted approach is what makes skin look perfect, not caked.
-
Start in the Center: Always begin with a small amount of foundation in the center of your face—around the nose, middle of the forehead, and chin. This is usually where you'll find the most redness or uneven tone.
-
Blend Outwards: Using your tool of choice, work the product outwards toward your hairline and jaw. This concentrates the coverage where it’s needed most and lets it fade away naturally at the edges of your face. No harsh lines.
-
Assess and Build: Take a step back. Still see a blemish or some redness peeking through? Add another super-thin layer just to that specific spot, gently tapping to blend the edges until it disappears.
This technique is the foundation (pun intended) of creating makeup that’s both durable and photogenic. It’s a core skill we use constantly for events like weddings, as we detail in our guide to bridal makeup and hair, where a flawless base has to hold up for hours of photos and celebration.
Setting Your Makeup for the Camera
Once your foundation is blended to perfection, you need to lock it in. Setting your makeup is what stops it from creasing, fading, or getting shiny halfway through a photoshoot. But be careful—the wrong powder can cause ghostly flashback or add a layer of texture that undoes all your hard work.
Always reach for a setting powder that is both finely-milled and translucent. Heavy, colored powders can change the shade of your foundation and look chalky under flash.
Your technique here is just as important. Skip the big fluffy brush that dusts powder everywhere. Instead, get targeted. Use a smaller, softer brush or a powder puff to gently press the powder into the areas that need it most—your T-zone, under the eyes, and around the nose. This sets your makeup exactly where you need it without killing that beautiful, skin-like glow you worked so hard to create.
Solving Common Foundation Issues in Photos
Even when you’ve done everything right—the prep, the application—makeup can still have a mind of its own, especially under the unforgiving eye of a camera lens. The real skill is knowing how to spot and fix these little mishaps on the fly. Let’s walk through how to troubleshoot the most common on-camera problems, turning potential photo disasters into flawless shots.
Why Your Foundation Turned Orange
Have you ever applied your foundation perfectly, only to look in the mirror an hour later and see it's turned a strange, orangey shade? That's oxidation. It’s a chemical reaction between the pigments in your makeup and your skin’s natural oils, its pH balance, and even the air itself.
To stop this from happening, start with an oil-free formula and never skip the primer. A good primer acts as a barrier between your skin and the foundation, which seriously cuts down on that unwanted color shift. The best way to know for sure? Get a sample, apply it to your jawline, and then just live your life for a couple of hours. You'll see exactly how it's going to behave on your skin.
Stopping Foundation from Settling into Lines
Nothing ages you faster in a photo than foundation that’s settled into fine lines and creases. This usually means the formula is too thick and dry, or the skin underneath is thirsty for moisture.
The secret is almost always using less product, not more. Piling on foundation is a surefire way to make it settle into every expression line. Instead, focus on hydrating your skin and applying foundation in thin, buildable layers.
Here's a quick game plan to keep foundation from creasing:
- Hydrate First: Make sure your skin is properly moisturized, paying extra attention to the areas around your eyes and mouth. Plump, hydrated skin creates a smooth canvas with fewer places for makeup to get stuck.
- Use a Damp Sponge: Applying foundation with a damp makeup sponge is a game-changer. It sheers out the product and gently presses it into the skin for a seamless, second-skin finish.
- Set Strategically: Take a tiny bit of a finely-milled translucent powder and lightly press it only onto the areas that tend to crease. This locks everything in place without adding any heavy texture.
Managing Oily and Dry Skin on Camera
Camera lighting can be brutal. It has a way of highlighting every bit of oily shine and every single dry, flaky patch. The key to looking great in any shot is learning how to work with your skin type, not against it.
For oily skin, you want to control shine without looking completely flat or dull. A mattifying primer just on the T-zone is a great first step. After your foundation is on, use a powder puff to press translucent powder into those areas that get oily. And always keep blotting papers in your kit—they're perfect for quick touch-ups that absorb oil without messing up your makeup.
For dry skin, the biggest enemy is cakiness. Stay far away from heavy, matte foundations and look for hydrating formulas with a satin finish. Always moisturize well before you start and think about using a hydrating primer to create a smooth, even base. If you feel you need to set your makeup, use a very light hand and apply powder only where you absolutely need it.
Of course, a flawless finish sometimes gets a little help in post-production. Understanding the role of digital editing is a big part of the quest for picture-perfect social media images. But by mastering these simple troubleshooting techniques, you can step in front of any camera with confidence, knowing your makeup is going to look amazing.
Your Photo Makeup Questions, Answered
Let's be honest, getting your makeup right for a big event or photoshoot can feel like a high-stakes game. A lot of the usual makeup rules go out the window when a camera is involved. Here are some of the questions I get asked all the time, with straight-to-the-point answers.
Is Any Amount of SPF Safe for Flash Photos?
This is a big one. The safest bet? Just skip SPF entirely if you know there will be flash photography.
Even a low SPF 15 is a gamble because the key ingredients that cause that ghostly white cast—Titanium Dioxide and Zinc Oxide—are still present. While it's less risky than a higher SPF, the only way to be 100% sure you won't get flashback is to choose a foundation with no SPF at all.
How Can I Check if My Foundation Will Cause Flashback?
Don't wait until the day of the event to find out your foundation is a dud. You can easily test this at home.
Just apply your foundation like you normally would, find a dark room, and snap a selfie with your phone’s flash turned on. You'll know instantly if you see that dreaded white cast. It's a simple, two-minute test that can save you from a lot of photo regret later.
Should I Go Lighter or Darker With My Foundation for Pictures?
Neither! Your foundation should be a perfect match for your skin. This is non-negotiable for photos.
A shade that's too light will make you look washed out and create an obvious line at your jaw. Go too dark, and your face can look muddy or orange. The trick is to find an exact match in natural daylight, swiping shades along your jawline to see which one disappears into your skin.
Is Liquid or Powder Foundation Better for Photography?
Both have their place, but I almost always lean toward liquid and cream formulas for photoshoots. They have this incredible ability to melt into the skin, giving you a finish that looks like, well, skin. High-definition cameras pick up every little detail, and liquids create a more seamless look.
Powder foundation can be tricky under studio lights. It has a tendency to look a bit dry or cakey, and it can settle into fine lines, which the camera will definitely notice.