Portrait Photography Lighting Setup: A Complete Beginner's Guide
A truly great portrait photography lighting setup comes down to controlling just three things: the quality of the light, its direction, and its intensity. Once you get a handle on these fundamentals, you'll start creating professional, compelling portraits with real intention and style, leaving simple snapshots behind.
Understanding the Language of Light in Portraits
Before you even think about setting up a strobe or a softbox, you need to understand the "why" behind your lighting choices. This isn't about memorizing rigid diagrams; it's about learning to speak the language of light. The decisions you make here will shape the mood, depth, and entire feeling of your final image.
The first big choice is always between hard and soft light. Think of hard light like the direct sun at high noon—it creates crisp, defined shadows and a ton of contrast. This is fantastic for dramatic, edgy, or highly stylized portraits where you want to bring out every bit of texture and form.
Soft light, on the other hand, is like the gentle light on an overcast day. It wraps beautifully around your subject, softens shadows, and is incredibly flattering for skin. This is why a big softbox or an umbrella is the go-to for beauty work, family photos, and corporate headshots.
The Core Trio: Key, Fill, and Rim Lights
Most professional portrait setups are built on a classic three-light foundation. While you can absolutely create stunning work with just one light, knowing how these three work together is the key to adding that extra dimension and polish.
- Key Light: This is your main light source. It sets the overall exposure and creates the primary light pattern on your subject's face.
- Fill Light: Placed on the opposite side of your key light, its only job is to fill in the shadows. The power you give it determines whether your portrait is dramatic and contrasty or soft and airy.
- Rim Light: This one goes behind your subject. Often called a hair light or a kicker, it creates a subtle, bright outline around their hair and shoulders. This little touch is what separates them from the background, adding a fantastic sense of depth.
Light doesn't just illuminate; it sculpts. Your ability to control its quality and direction is what transforms a flat, two-dimensional photo into a portrait with depth, emotion, and character.
To help you keep these roles straight, here's a quick cheat sheet.
Key, Fill, and Rim Light Functions at a Glance
| Light Type | Primary Role | Common Placement | Desired Effect |
|---|---|---|---|
| Key Light | Main light source | 45° to the side and above the subject | Defines shape and primary shadows |
| Fill Light | Reduces shadow harshness | Opposite the key light, lower power | Controls contrast and mood |
| Rim Light | Separates subject from background | Behind and to the side of the subject | Creates a subtle outline or "halo" |
This table is a great starting point, but remember that the "rules" are meant to be broken once you understand them.
The Physics of Light Placement
There’s a crucial concept you have to get your head around: the inverse square law. In plain English, the farther your light is from your subject, the weaker and harder its quality becomes. For example, if you double the distance of your key light from your subject, the light hitting them is now only one-quarter as bright. This is hugely important to remember, especially when you're trying to light a group evenly.
Understanding how light shapes a narrative is what separates a good photographer from a great one. To dig deeper into how to convey emotion through your images, you should learn how to master visual storytelling techniques. Once you have that foundation, you can see these principles in action in our guide to essential portrait photography tips.
Building Your First Portrait Lighting Kit
Jumping into the world of artificial light can feel intimidating, but you don't need a truck full of gear to get started. Honestly, a simple, well-chosen kit is way more effective than an arsenal of equipment you don’t fully understand. The real goal is to begin with versatile, high-impact pieces that you can grow with over time.
Your first big decision is choosing between strobes (what we call flash) and continuous lights. Strobes fire off a powerful, split-second burst of light, while continuous lights, like LEDs, just stay on. For portraits, strobes are almost always the way to go. That intense burst of light freezes motion, giving you incredibly sharp images, and they don't generate the kind of heat that can make your subjects sweaty and uncomfortable.
This wasn't always the standard. The move away from hot lights was a huge shift in studio photography. Over the following decades, most professional studios switched to electronic flash. Why? Studios found they could work faster and keep their subjects far more comfortable.
Choosing Your First Light Modifier
A bare flash bulb is harsh and unflattering. The real magic of a portrait photography lighting setup comes alive when you add a modifier to shape and soften that light. Each one gives you a completely different look.
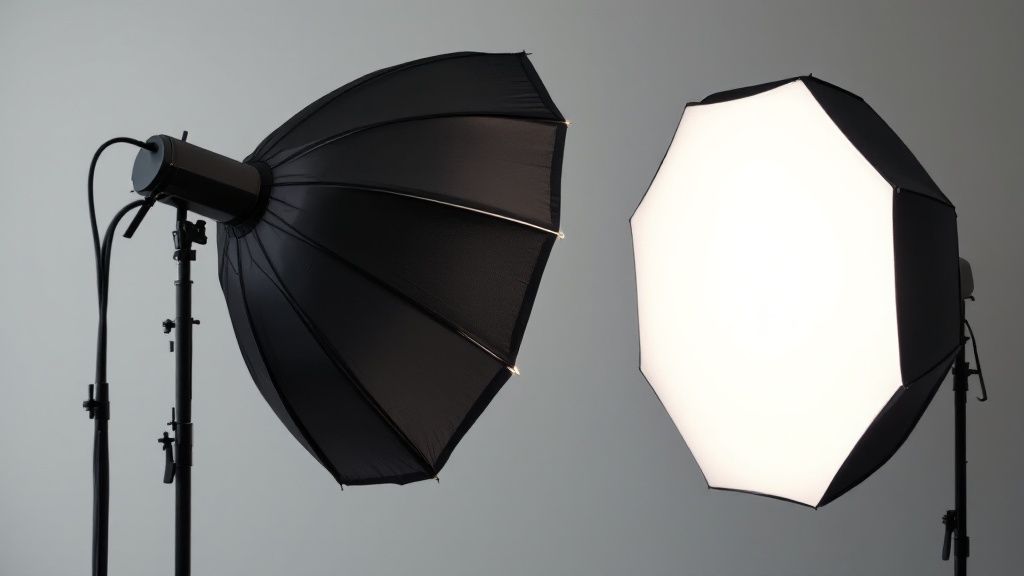
- Softbox: This is the absolute workhorse of portrait photography. It creates a soft, directional light that beautifully mimics a north-facing window. I'm a big fan of the octabox (an eight-sided softbox) for the gorgeous, round catchlights it puts in a subject's eyes.
- Umbrella: Umbrellas are fantastic because they're affordable and incredibly easy to set up. A shoot-through umbrella gives you a broad, soft light, while a reflective one bounces the light back for a more controlled, slightly punchier look.
- Beauty Dish: Just like the name implies, this is a favorite for beauty and fashion work. It produces a light that's softer than a bare bulb but has more contrast and pop than a softbox. It’s perfect for sculpting facial features and making skin texture look amazing.
If you want a deeper dive into piecing together your first lighting rig, check out this excellent guide on mastering your professional photography lighting setup.
Pro Tip: When in doubt, start with a large (think 36-48 inch) octabox. Its light is so forgiving and beautiful, making it one of the most versatile modifiers you can own. It works for everything from tight headshots to full-body portraits.
The Essential Support System
Your lights and modifiers are useless if they’re just sitting on the floor. You need the right support gear, and these are the unsung heroes of any good kit.
First up, you need sturdy light stands. Please don't cheap out here—a flimsy stand is just an accident waiting to happen. C-stands are the industry gold standard for their stability, but good-quality aluminum stands are a more portable and affordable place to start.
Next, you'll need triggers. A wireless trigger system is what allows your camera to "talk" to your off-camera flash. This is non-negotiable for getting creative with your lighting. Look for a reliable system from brands like Godox or Profoto that lets you control the power of your flash right from your camera.
Finally, a simple 5-in-1 reflector is one of the most powerful and inexpensive tools you can own. You can use it to bounce light back into shadows (acting as a fill light), diffuse harsh sunlight, or even block light to create more drama. The principles of building a solid kit are pretty universal, whether for portraits or fast-paced events. You can see how these same concepts apply in our comprehensive guide to wedding photography lighting gear.
Creating Powerful Portraits with a Single Light
If you're going to master one thing in portrait photography, make it the single light. It’s the ultimate foundation. Working with one light forces you to truly see how its position and quality can carve out a person's features. It’s no surprise that some of the most iconic portraits in history were made with this beautifully simple approach.
The power of a one-light portrait photography lighting setup is its clarity and control. You’re not juggling ratios or worrying about multiple catchlights. Your entire focus is on that one source, shaping the highlights and letting the shadows tell the rest of the story. This isn't just a starting point for beginners; it's a deliberate creative choice that professionals return to again and again for dramatic, timeless images.
Exploring Classic One-Light Patterns
There are three classic patterns that are essential to know. Think of them as the fundamental vocabulary of portrait lighting.
- Split Lighting: This is all about drama. By placing your light at a 90-degree angle to your subject, you light exactly half of their face and let the other half fall into deep shadow. It’s a powerful, high-contrast look that’s fantastic for creating gritty, character-driven portraits.
- Loop Lighting: This is your go-to for a universally flattering look. Just move the light to about a 45-degree angle and raise it slightly above eye level. The result is a small "loop" of shadow from the nose that points toward the corner of the mouth, which adds dimension without feeling overly theatrical.
- Rembrandt Lighting: Named after the legendary painter, this style is famous for the small, isolated triangle of light it creates on the shadowed side of the face. To get it, you’ll need to position your light a bit higher and more to the side than you would for loop lighting. Keep adjusting until that signature triangle appears just below the eye.
The real secret to a single-light setup is that tiny adjustments make a huge difference. Moving your light just six inches to the side or raising it a foot can completely change the mood. You have to experiment.
Using a Reflector as Your "Second" Light
Just because you’re using one flash doesn't mean you can only have one source of illumination. A simple reflector is the perfect tool for turning a single light into a much more versatile setup.
By placing a reflector on the opposite side of your main light, you can bounce light back into the shadows, giving you precise control over the overall contrast. A silver reflector kicks back a punchy, crisp light, while a white one offers a much softer, more subtle fill. Suddenly, you can dial down the shadows for a clean corporate headshot or keep them deep and moody for an artist's portrait, all without adding a second strobe.
A single off-camera flash is often the perfect tool for this—it's portable, powerful, and easy to manage. If you're looking for gear-specific advice, our guide on using off-camera flash for Sony mirrorless cameras has plenty of tips that translate to almost any camera system.
Taking Your Portraits to the Next Level with Two and Three Lights
Once you're comfortable with a single light, you've got the foundation down. But adding a second light? That's when you really start to sculpt and refine. This is how you go from a simple, dramatic portrait to something with that polished, professional feel.
The second light you add to your kit is almost always going to be your fill light. Its entire job is to control the shadows your main light (the key light) creates. You can think of it as a shadow-softening tool. Dial it up for a bright, clean look perfect for headshots, or keep it low to maintain a moody, dramatic atmosphere.
The Role of the Fill Light
The trick to a good two-light setup is all about balance. The fill light shouldn't be fighting your key light for attention or, even worse, creating a second set of confusing shadows. Its purpose is to gently open up the dark areas, bringing back a touch of detail without making the image look flat.
A classic way to set this up is to place the fill light on the opposite side of your camera from the key light. As for power, a great rule of thumb is to start with it at half the power of your key light, or even less. If your key light gives you a meter reading of f/8, try setting the fill light to f/5.6. This gives you a 2:1 ratio, creating a contrast that adds shape without being overly harsh.
The number one mistake I see with a second light is setting it too bright. A great fill light is felt, not seen. It should whisper, not shout, softening shadows just enough to keep them from being pure black voids.
This infographic breaks down how different power ratios between your key and fill light can completely transform the vibe of your portrait.
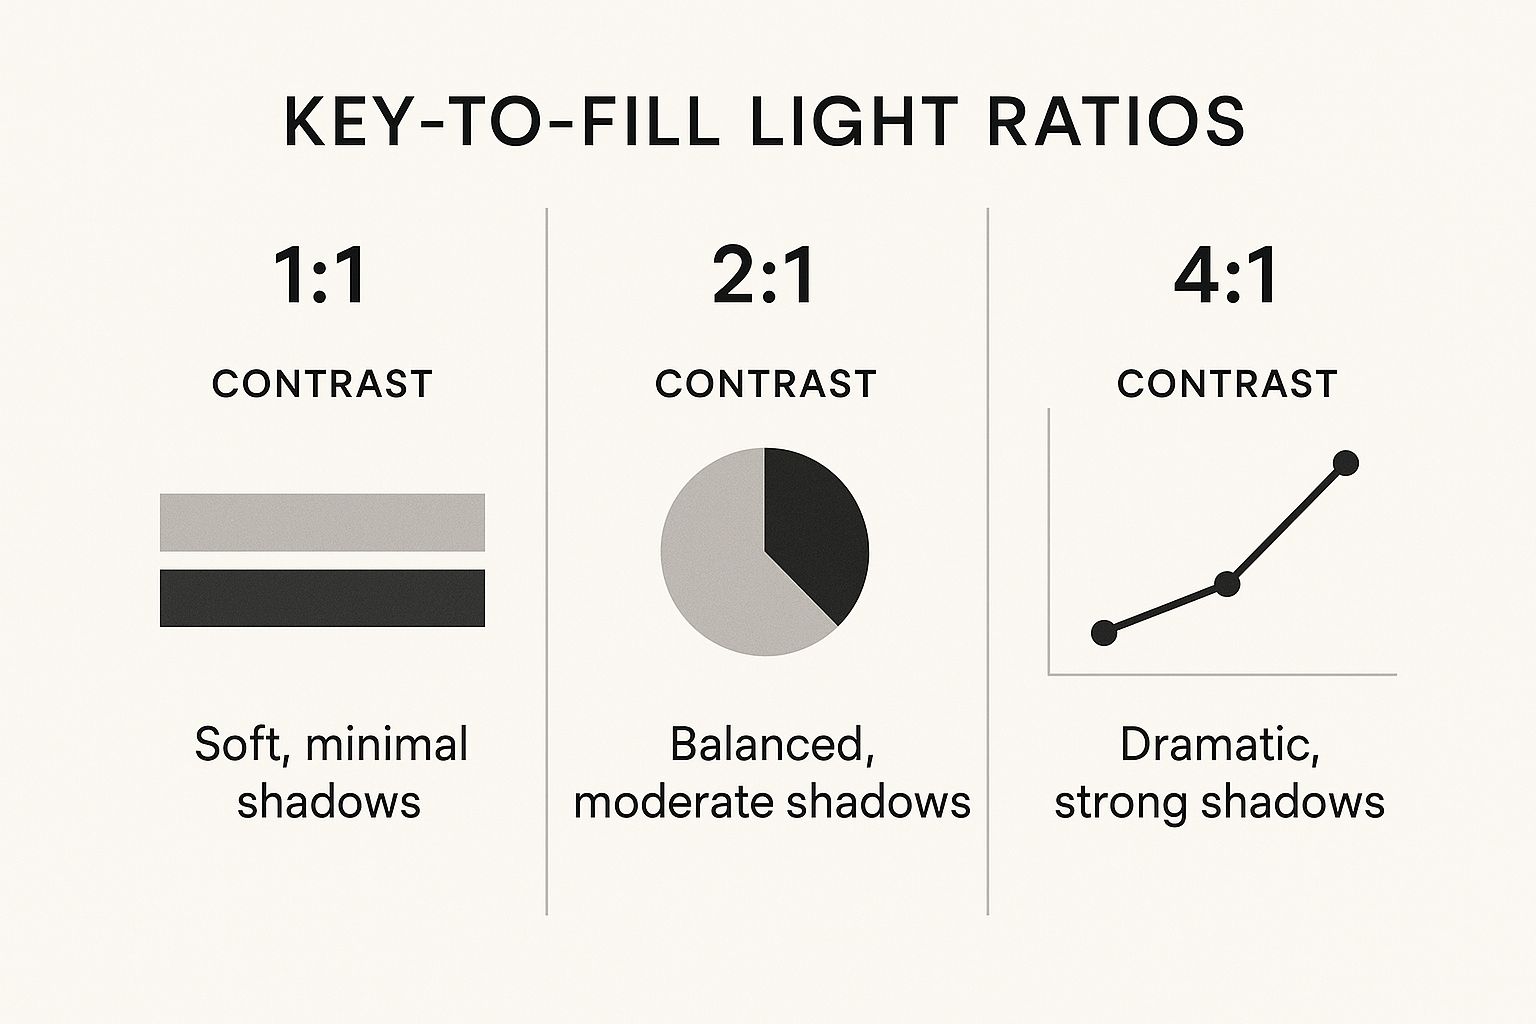
You can see how a low ratio like 1:1 creates a very soft, even look with minimal shadow, while pushing it to 4:1 or higher really carves out the face with deep, defined shadows.
One, Two, and Three-Light Setup Comparison
As you add more lights to your setup, your creative options expand, but so does the complexity. Here’s a quick look at how these setups compare in the real world.
Setup
Common Uses
Key Advantage
Main Challenge
One-Light
Dramatic portraits, Rembrandt lighting, moody headshots
Simplicity and control; easy to master.
Can create harsh, deep shadows without a reflector.
Two-Light
Corporate headshots, beauty, polished portraits, high-key looks
Balances contrast and reveals detail in the shadows.
Balancing the key-to-fill ratio to avoid a flat look.
Three-Light
Studio portraits, commercial work, creating subject-background separation
Creates a 3D effect, making the subject pop.
Light placement becomes critical to avoid lens flare and unwanted spill.
Building up from one to three lights is a natural progression that teaches you how each light contributes to the final image. Each step gives you another tool to shape your vision.
Adding That Final Pop with a Third Light
This is where the magic happens. A third light is what separates your subject from the background and gives your image that final, crisp dimension. We usually call this a rim light or a hair light.
You'll place this light behind your subject, typically to one side and pointing back towards the camera. Its goal is to trace a thin, bright line along the edge of your subject’s hair and shoulders. This little highlight creates a clean separation that makes the portrait feel truly three-dimensional. It's the secret sauce in so many iconic studio shots.
Here are a few tips I've learned for getting the rim light just right:
- Hide the Stand: Position the light behind the subject and high enough that the stand is completely out of your frame.
- Control the Beam: You don't want light blasting everywhere. A grid or a snoot is your best friend here, as it narrows the beam to just kiss the edges of your subject. This prevents light from spilling onto your background or flaring your lens.
- Get the Power Right: The rim light should be just bright enough to be noticeable without being distracting. I often start with it at a similar power setting to my key light and then adjust up or down by looking at the back of my camera.
These multi-light setups are foundational skills in photography. The same principles of shaping light and creating separation apply in all sorts of situations, including the fast-paced world of wedding photography lighting techniques, where you have to adapt these studio concepts on the fly.
Troubleshooting Common Lighting Problems
Even with the best-laid plans, every photographer runs into lighting issues on set. It happens to everyone. The real skill is learning how to spot and fix these problems on the fly. Think of these challenges less as failures and more as opportunities to really hone your craft.
A common one I see is "flat" lighting, which makes your subject look almost two-dimensional. This is almost always a dead giveaway that your key light is too close to the camera's axis, which kills all the interesting shadows that give a face its shape. The fix is usually easy—just move your light further to one side to bring back that depth.
Then there's the classic "raccoon eyes." You know the look: harsh, unflattering shadows under the eyebrows that hide the eyes. This happens when your main light is way too high. A high key light can look dramatic, but if it hides the eyes, you've lost the most important part of the portrait.
Eliminating Unwanted Shadows and Glare
To fix those raccoon eyes, you can either lower the light source or add a reflector placed underneath the subject's face. A gentle bounce of light from below will soften those shadows and bring life back to their eyes, re-establishing that vital connection with the viewer.
Reflections in eyeglasses are another beast entirely. Trust me, it’s a problem you’ll face constantly, but it all comes down to working the angles.
Here are a few things to try immediately:
- Move the light up and over. Try raising your main light higher and positioning it further to the side than you normally would.
- Adjust your subject. A slight downward tilt of their head or a small turn of their face away from the light can work wonders.
- Change your own position. Sometimes all it takes is shifting your camera a few inches to the left or right to make the reflection vanish.
A great way to think about this is remembering that the angle of incidence equals the angle of reflection. You just need to position the light so its reflection bounces away from your lens instead of directly into it.
Mastering the Art of Feathering Your Light
Ever set up a softbox and felt the light on your subject was still a little too "on the nose" or harsh? This is the perfect time to try a technique called feathering. Instead of aiming the heart of your light source directly at your subject, you aim it just in front of them.
By doing this, you're using the softer, less intense edge of the light beam to illuminate their face. It creates a beautifully soft and gradual transition from highlight to shadow. It’s a subtle move, but it adds an incredible amount of sophistication to a portrait.
Sometimes, what feels like a massive lighting problem is just one small tweak away from being perfect. It's a bit like how a tiny bit of motion blur can impact an otherwise fantastic shot. For more on that, check out our expert tips on how to handle blurry wedding photos.
Frequently Asked Questions About Portrait Lighting
Once you start diving into portrait lighting, you'll find that one answer often leads to three new questions. It's a natural part of the learning process. To help you along, I’ve put together answers to some of the most common things photographers ask when they're figuring out their lighting.
Think of these as quick, practical solutions you can use to troubleshoot issues and make better decisions when you're on a shoot.
What Is the Best Single Light Modifier for a Beginner?
If you're buying your very first modifier, my advice is almost always the same: get a large octabox or a good convertible umbrella. You can't go wrong with either.
An octabox, especially one in the 36 to 48-inch range, produces a gorgeous, soft light that's incredibly forgiving. It wraps around your subject beautifully and has a quality that’s very similar to natural window light, which is flattering for almost everyone.
A convertible umbrella is another workhorse because it's essentially two tools in one. You can bounce light off the inside for a broad, room-filling softness, or you can point it at your subject and shoot through it for a more direct, but still diffused, beam. Both are budget-friendly and give you a fantastic starting point for learning how to control and shape light.
The most versatile modifier is one that’s large and soft. A bigger light source relative to your subject will always create more flattering light, which is why a large octabox is a go-to tool for portrait photographers at every skill level.
How Do I Avoid Getting Reflections in My Subject's Glasses?
Glare on glasses is one of those classic problems every portrait photographer runs into. The solution is all about angles—specifically, the angle of your light in relation to your subject's glasses and your camera. The goal is to position the light so its reflection bounces away from your lens, not directly into it.
Here are a few things I do in this situation:
- Raise the key light. Move your main light higher than usual and have your subject dip their chin just a bit.
- Move the light to the side. Pushing your light further off to the left or right can shift the reflection right out of the frame.
- Go bigger and softer. A large light source, like a big softbox, creates a wider, more diffused reflection that's less distracting than a small, hard pinpoint of glare.
What Is the Difference Between High-Key and Low-Key Lighting?
These terms are less about a specific setup and more about the overall mood and feeling of the final image.
High-key lighting is bright, airy, and has very few shadows. You're using a lot of light—often from multiple sources—to create an optimistic and clean look. Think bright white backgrounds and an almost shadowless subject.
Low-key lighting, on the other hand, is all about drama and mood. It embraces deep shadows and high contrast to create a mysterious or intense feeling. This is often achieved with just a single, carefully placed light source against a dark background, letting much of the scene fall into pure black.
At Candid Studios, we believe that mastering light is the key to telling unforgettable stories. Whether you need timeless portraits, cinematic wedding films, or engaging commercial content, our team is dedicated to bringing your vision to life. Explore our services and see how we capture life’s most meaningful moments at Candid Studios.