Newborn Photography Posing Guide: Safety & Style

Capturing the delicate first days of a newborn’s life requires a unique blend of artistic vision and rigorous safety standards. Whether you are a professional photographer looking to refine your style or a parent hoping to document these fleeting moments, mastering the art of posing is essential. This comprehensive newborn photography posing guide will walk you through the techniques, safety measures, and creative strategies needed to create stunning, heirloom-quality images.
Photographing newborns is significantly different from any other genre of photography. It requires patience, a gentle touch, and a deep understanding of infant anatomy. In this newborn photography posing guide, we will explore everything from the classic “potato sack” pose to more advanced setups, ensuring you have the knowledge to handle any session with confidence.
Why a Posing Guide is Essential for Newborn Sessions
Many new photographers underestimate the complexity of newborn posing. Unlike adults, babies cannot follow instructions. Therefore, the photographer must act as the sculptor, gently molding the infant into poses that highlight their innocence and fragility. A solid newborn photography posing guide serves as a roadmap, helping you maintain a smooth workflow while keeping the baby’s comfort and safety as the top priority.
The Importance of Safety First
Before diving into specific poses, we must address the most critical aspect of this newborn photography posing guide: safety. Newborns have limited neck control and fragile skeletal systems. A pose that looks simple can be dangerous if not executed correctly.
- Always support the head: Never let the baby’s head flop or hang unsupported.
- Spotting is mandatory: An adult hand or arm should always be within inches of the baby to prevent falls.
- Composite images: Complex poses (like the froggy pose) should always be created as composites. You take one photo with the baby in position, another with the hand supporting the head, and merge them in post-processing.
Essential Gear for Successful Posing
To execute the strategies in this newborn photography posing guide, you need the right tools. The environment plays a massive role in how easily a baby settles into a pose.
- Heating: The room must be warm (around 80-85°F or 26-29°C). A cold baby is a wakeful, unhappy baby.
- Posing Beanbags: These provide a malleable, soft surface that allows you to shape the baby’s body safely.
- Wraps and Fabrics: High-quality, breathable fabrics are crucial for swaddling and texture.
- Props: Wooden bowls, buckets, and crates add variety but must be stable and weighted.
Core Strategies for Soothing and Settling
A key component of this newborn photography posing guide is learning how to soothe the baby. You cannot pose a crying infant. Implementing these newborn photography posing guide strategies will help ensure a smooth session:
1. Full Feeding: Encourage parents to feed the baby right before the session. A full baby is a sleepy baby.
2. White Noise: Use a loud white noise machine to mimic the sounds of the womb.
3. Movement: Gentle bouncing or rocking can help lull the baby into a deep sleep.
4. Shushing: A loud “shhh” sound close to the baby’s ear can be very calming.
Step-by-Step Poses from the Newborn Photography Posing Guide
Now, let’s move into the specific poses. These newborn photography posing guide tips are arranged from simplest to most complex.
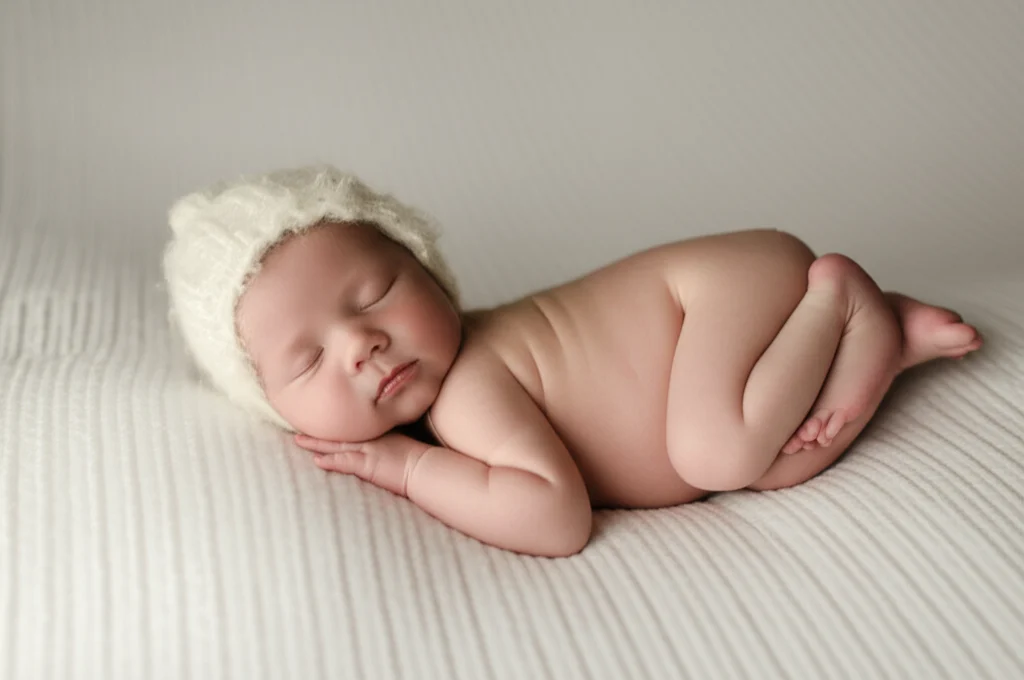
The Classic “Potato Sack” or Wrapped Pose
This is the foundation of newborn photography posing guide best practices. It is versatile, secure, and keeps the baby warm.
- Technique: Lay the baby on the beanbag. Wrap the arms securely at the sides or over the chest. The wrap should be snug but not restrictive.
- Why it works: It contains the startle reflex, keeping the baby asleep longer. It also creates a clean, timeless look that focuses entirely on the face.
The Side-Lying Pose
This pose highlights the baby’s profile and is incredibly cute. It is a staple in any newborn photography posing guide.
- Technique: Lay the baby on their side. Use a rolled blanket or towel under the back to prop them up slightly. Tuck the hands gently under the chin or near the face.
The Tushy-Up Pose
Also known as the “bum up” pose, this is adorable for showing off those tiny newborn feet and diaper details.
- Technique: Gently curl the baby into a fetal position on their knees. Tuck the head down toward the knees. Ensure the baby can breathe freely and is not putting pressure on their nose or mouth.
The Froggy Pose (Advanced)
This is the most requested pose by parents but requires strict adherence to newborn photography posing guide guide principles regarding safety.
- Technique: The baby’s hands support their chin, and the feet are tucked under the bottom.
- Safety Alert: Do not attempt this without compositing. You must have one hand supporting the baby’s head and another on the baby’s back at all times during the shooting phase. You will edit these hands out later.
Parent Poses: Incorporating Family
A complete newborn photography posing guide must include the parents. These images are often the most emotional and valuable.
- The Pose: Have the parent sit on a bed or the floor. Guide them to place the baby on their shoulder or in their hands.
- Focus: Concentrate on the connection—the parent looking at the baby rather than the camera. Ensure the parent’s clothing is neutral and fits the color palette.
Advanced Techniques and Troubleshooting
Even with a detailed newborn photography posing guide, things can go wrong. Here are strategies for common issues:
- The “Accordian” Baby: If the baby keeps straightening their legs, they may not be fully asleep or might be over-stimulated. Try swaddling them tighter or taking a break for feeding.
- Cradle Cap: If the baby has dry skin or cradle cap, avoid high-contrast lighting that highlights texture. Use softer, more diffused lighting.
- Color Palette: Stick to muted, earthy tones or soft pastels. Bright, clashing colors distract from the baby.
Newborn Photography Posing Guide for Beginners
If you are just starting, do not feel overwhelmed. You do not need to master 50 poses. Focus on mastering 3-5 simple poses and executing them perfectly. Consistency is key. Use this newborn photography posing guide for beginners as a checklist rather than a rulebook. Every baby is different, and flexibility is part of the job.
Post-Processing Considerations
Posing doesn’t end when the shutter clicks. Part of your newborn photography posing guide strategy should involve editing.
- Skin Retouching: Newborns often have peeling skin or redness. Learn to frequency separate to smooth skin tones while keeping texture realistic.
- Compositing: As mentioned, perfect the art of merging the “spotter” images with the “clean” images to create safe, magical photos.
Conclusion
Mastering newborn posing is a journey that combines art, psychology, and safety. By following the principles in this newborn photography posing guide, you can ensure that every session is safe, efficient, and produces beautiful art that families will cherish for a lifetime. Remember, the best pose is always one that prioritizes the comfort and safety of the newborn.
FAQ
Q: What is the best age for a newborn photography session?
A: The optimal time is between 5 and 14 days old. During this window, babies are still very sleepy and curl easily into the fetal position, making them much easier to pose safely.
Q: How do I keep a newborn asleep during a photoshoot?
A: Maintain a warm room temperature (around 80°F), use loud white noise to mimic the womb, and ensure the baby is fed right before the session starts. Full, warm babies sleep best.
Q: Is the “froggy pose” safe for newborns?
A: The pose itself is safe only if executed as a composite image. Never let a baby support their own head weight. You must use Photoshop to merge a photo where you are supporting the baby with a “clean” shot.
Q: What props do I need for a beginner newborn session?
A: Start with the basics: a supportive beanbag, a variety of wraps and blankets, a few neutral-colored backdrops, and a reliable space heater. Simple props often produce the best results.
Q: How long does a typical newborn photography session take?
A: Plan for 2 to 4 hours. Newborns are unpredictable, and you need ample time for feeding, soothing, diaper changes, and careful posing without rushing.
Contact Candid Studios today to learn more about how we can help your business.