7 Types of Best Lighting for Portrait Photography in 2026

The difference between a good portrait and a breathtaking one often comes down to a single, critical element: light. Understanding how to shape, control, and utilize light is arguably the most powerful skill in a photographer's toolkit. It’s the tool that sculpts features, creates mood, and adds a professional polish that no other technique can replicate. But with an overwhelming number of options available, from complex studio strobes to the simple elegance of a sunlit window, knowing where to begin can feel daunting. This guide is designed to cut through the confusion.
We will demystify the process by breaking down the seven best lighting for portrait photography setups and techniques that professionals rely on to create consistently stunning, memorable images. This isn't a theoretical overview; it's a practical roadmap. For each lighting style, we will provide specific, actionable insights you can apply immediately, regardless of your current skill level.
You will learn not just what to use, but how and why. We will cover:
- Specific Equipment: From softboxes and beauty dishes to simple reflectors.
- Practical Setups: Clear diagrams and step-by-step instructions for different scenarios.
- Creative Applications: How to choose the right light to achieve a specific mood or style.
Whether you are an aspiring photographer aiming to master the fundamentals or a seasoned pro looking for fresh inspiration, this comprehensive list will equip you with the knowledge to conquer any lighting challenge. Let’s illuminate the path to capturing flawless portraits and transform your work from standard to exceptional.
1. Softbox Lighting
A softbox is arguably one of the most fundamental and versatile tools in a portrait photographer’s arsenal, making it a cornerstone for achieving the best lighting for portrait photography. It consists of a fabric enclosure, typically with a reflective interior and a white diffusion panel on the front. By placing a light source like a studio strobe or a continuous LED inside, the softbox scatters and softens the light, creating a beautiful, even illumination that is incredibly flattering for human subjects.
This diffusion process minimizes harsh shadows, reduces skin imperfections, and produces a gentle wraparound effect. The resulting light mimics the soft, pleasing quality of a large, overcast window, giving photographers precise control over a look that feels both professional and natural. Its adaptability makes it a go-to choice for everything from corporate headshots to high-fashion editorials.
Why Softboxes are Essential
Softboxes are celebrated for their ability to create soft, directional light. Unlike an umbrella, which spills light everywhere, a softbox provides more control over the light’s direction and shape. This control is crucial for sculpting a subject's features and creating specific moods. Legendary photographers like Annie Leibovitz often use massive octagonal softboxes to envelop their celebrity subjects in a luxurious, soft glow, while commercial photographers rely on them for clean, consistent results.
Actionable Tips for Using Softboxes
To get the most out of your softbox, consider these practical techniques:
- Size Matters: The larger the softbox relative to your subject, the softer the light will be. For a full-body shot, a large 5-foot octabox is ideal. For a headshot, a smaller 24×36 inch softbox can provide excellent results.
- Proximity is Key: Moving the softbox closer to your subject will create softer shadows and a more pronounced light falloff. Pulling it further away results in harder, more defined shadows and a more even spread of light.
- The 45-Degree Rule: For a classic and universally flattering portrait look (often called Rembrandt or loop lighting), position the softbox at a 45-degree angle to the subject and slightly above their eye level.
- Control Light Spill: Many softboxes are compatible with an egg-crate grid. This accessory attaches to the front and narrows the light beam, preventing it from spilling onto the background and giving you a more focused, dramatic effect.
Softboxes are the workhorse of portrait studios for a reason. Their ability to produce consistently beautiful and controllable light makes them an indispensable tool for photographers aiming for professional-quality portraits. Mastering their use is a key step, and for more foundational techniques, you can explore these essential portrait photography tips.
2. Ring Light Setup
A ring light is a circular light source that mounts around the camera lens, delivering a distinct, even, and nearly shadowless illumination directly onto a subject. This unique setup creates what is often considered the best lighting for portrait photography in the beauty and online content world. Originally developed for dental and medical use, its ability to produce soft, direct light has made it a favorite for beauty vloggers, makeup artists, and influencers.
The primary characteristic of a ring light is its ability to eliminate harsh shadows on the face by lighting the subject from all directions around the lens axis. This creates a flat, flattering look that minimizes skin texture and blemishes. Perhaps its most recognizable feature is the signature circular catchlight it produces in the subject’s eyes, adding a vibrant and captivating spark that instantly signals a professional, modern portrait style.
Why a Ring Light Setup is Effective
Ring lights are celebrated for their simplicity and the glamorous, high-key look they produce. By placing the light source on the same axis as the camera, it wraps the subject in a halo of light, which is particularly effective for close-up portraits and makeup tutorials where clear, even lighting is paramount. Its popularity soared with the rise of YouTube and Instagram, where creators like James Charles and NikkieTutorials used large ring lights to establish a consistent, polished aesthetic for their millions of followers.
Actionable Tips for Using a Ring Light
To achieve professional results with your ring light, follow these practical techniques:
- Distance and Intensity: Position the subject between 3 to 6 feet from the light. Too close, and the light can appear flat and harsh; too far, and you lose the signature shadow-filling effect. Adjust the brightness to complement, not overwhelm, your subject's features.
- Angle for Flattery: For the most flattering results, position the ring light directly at the subject’s eye level. This ensures the circular catchlights are perfectly centered in their eyes and the light is distributed evenly across their face.
- Add Dimension: A ring light alone can sometimes make a scene look flat. To create more depth, introduce a secondary light source, like a small LED panel or a hair light, to separate your subject from the background.
- Use Bi-Color Models: Invest in a bi-color ring light that allows you to adjust the color temperature. This gives you the creative flexibility to match ambient light, create a warm, inviting glow, or maintain a cool, clinical look.
The following infographic outlines the simple three-step process for getting started with a ring light for portraits.

This workflow highlights the importance of matching the light's size to your needs, ensuring proper camera placement, and fine-tuning the distance and color to achieve the desired effect. For anyone seeking that clean, modern, and engaging portrait style popularized by online creators, a ring light is an accessible and powerful tool. It provides consistent, flattering light with minimal fuss, making it an excellent addition to any photographer's kit.
3. Three-Point Lighting Setup
The three-point lighting setup is a classic, time-tested framework that forms the foundation of professional portraiture and cinematography, making it a crucial technique for achieving the best lighting for portrait photography. This method utilizes three distinct light sources to shape, define, and separate a subject from their background: a key light, a fill light, and a back light. By strategically placing these lights, a photographer gains complete control over shadows, highlights, and dimension.
The key light is the main source of illumination, defining the overall look and feel. The fill light is a secondary, softer light used to reduce, or "fill in," the harsh shadows created by the key light. Finally, the back light (or hair light) is positioned behind the subject to create a subtle rim of light that separates them from the background, adding depth and a polished, three-dimensional quality to the image. This precise control is why it’s a standard in Hollywood and commercial studios.

Why the Three-Point Setup is a Gold Standard
This setup is revered for its ability to produce clean, controlled, and professional-looking results consistently. It's not just a lighting formula but a creative system that allows for infinite variation. By adjusting the power and position of each light, you can craft anything from a high-key, optimistic portrait to a low-key, dramatic character study. Photographers like George Hurrell and Yousuf Karsh built their legendary careers on mastering this technique to create iconic portraits of Golden Age Hollywood stars and world leaders. This system provides the ultimate control for sculpting your subject with light.
Actionable Tips for Using a Three-Point Setup
To master this fundamental technique, focus on the relationship between the lights:
- Establish Your Ratios: Start with a classic key-to-fill light ratio, such as 2:1 or 3:1. This means your key light is two or three times brighter than your fill. This creates pleasing shadows that add dimension without being overly harsh.
- Position the Back Light Carefully: Place the back light high and behind the subject, angled down so it grazes their hair and shoulders. Be careful to position it so it doesn't cause lens flare by pointing directly into your camera.
- Fine-Tune with Distance: Instead of constantly adjusting the power settings on your lights, try moving the fill light closer or further away from your subject. Small changes in distance can create subtle, precise adjustments to the shadow intensity.
- Control the Spill: Use modifiers like grids or barn doors on your key and back lights. This will prevent light from spilling onto the background or other parts of the scene, giving you a more focused and intentional look.
The three-point lighting setup is an essential skill for any serious portrait photographer. Its principles can be adapted for various scenarios, and you can see how similar lighting fundamentals are applied in different contexts by exploring these wedding photography lighting techniques.
4. Window Light Photography
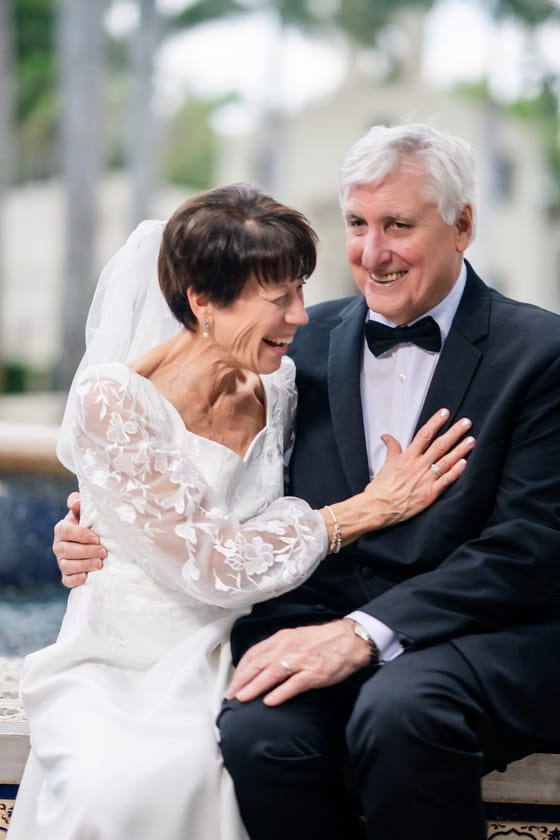
Often overlooked in favor of expensive gear, window light is one of the most powerful and flattering tools available, making it a classic choice for the best lighting for portrait photography. This technique involves using the natural, diffused light pouring through a window as the primary source of illumination. The window itself acts as a massive softbox, scattering sunlight to create a soft, directional glow that beautifully wraps around a subject’s features.
This approach produces an aesthetic that is both timeless and authentic, minimizing harsh shadows and rendering skin tones with a soft, delicate quality. Its accessibility is its greatest strength; you don't need a professional studio to create stunning portraits. From intimate home sessions to elegant bridal suites, window light provides a versatile and high-quality light source that can elevate any portrait.

Why Window Light is Essential
Window light is celebrated for its beautiful, painterly quality, a look that has been revered by artists for centuries, most notably in the works of Vermeer. The light is typically directional yet soft, allowing photographers to sculpt their subjects with gentle shadows that create depth and dimension without being overpowering. Headshot masters like Peter Hurley often rely on the clean, broad light from a large window to create his signature vibrant portraits.
This natural source is also incredibly dynamic. Depending on the time of day, weather, and the window's direction, the quality of light can range from soft and ethereal to crisp and dramatic. For those looking to master this technique in various settings, you can learn more from our experience as a Miami portrait photographer.
Actionable Tips for Using Window Light
To harness the power of window light for your portraits, implement these practical tips:
- Choose the Right Window: North-facing windows (in the Northern Hemisphere) are ideal as they provide soft, indirect light throughout the day. South-facing windows can work but may require a sheer curtain or diffuser to soften direct sun.
- Position Your Subject: For a classic look, place your subject at a 45 to 90-degree angle to the window. This creates beautiful loop or Rembrandt lighting patterns by allowing light to fall across one side of the face while leaving soft shadows on the other.
- Use a Reflector: Place a white foam core board or a collapsible reflector on the shadow side of your subject. This will bounce light back into the shadows, softening them and adding a gentle fill for a more balanced exposure.
- Time it Right: An overcast day is your best friend. The clouds act as a giant diffuser, creating the softest possible light. If it’s a sunny day, avoid the harshness of direct sunlight pouring through the window unless you are aiming for a high-contrast, dramatic effect.
- Maximize Your Light Source: To get the most out of your available light, ensure the room is as bright as possible. For photographers utilizing ambient sources, you can find excellent tips to increase natural light in your home that can make a significant difference.
Window light photography proves that you don’t need a complex setup to achieve professional results. By understanding how to shape and control this beautiful natural source, photographers can create portraits that are both stunning and deeply authentic.
5. Beauty Dish Lighting
A beauty dish is a specialized light modifier that occupies a unique space between the hard light of a bare bulb and the soft light of a softbox. This shallow, parabolic reflector features a central deflector plate that bounces light back into the main dish, creating a distinctive ring of illumination. The result is a crisp, focused light with defined, yet feathered, shadow edges, making it a top contender for the best lighting for portrait photography when a dramatic, sculpted look is desired.
This quality of light is particularly revered in fashion, beauty, and glamour photography. It accentuates textures and contours, like cheekbones and jawlines, while still being forgiving enough on skin to create a polished, high-end aesthetic. The rapid falloff of the light creates contrast and separation from the background, putting intense focus on the subject and delivering a look that is both striking and sophisticated.
Why a Beauty Dish is a Game-Changer
The beauty dish is celebrated for its ability to produce a crisp, contrasty light that has a unique wrap-around quality. Unlike the broad softness of a softbox, a beauty dish creates specular highlights that add a vibrant punch and a sense of life to the skin and eyes. This signature look was popularized by legendary fashion photographers like Richard Avedon and Mario Testino, who used it to sculpt models and create iconic, high-impact portraits.
Actionable Tips for Using a Beauty Dish
To harness the unique power of a beauty dish, consider these proven techniques:
- Classic Positioning: The most common placement is slightly above and angled down toward the subject's face, often referred to as "clamshell" lighting when paired with a reflector below. This setup creates a beautiful butterfly shadow under the nose and a flattering catchlight in the eyes.
- Silver vs. White: A silver beauty dish produces a more contrasty, specular light with harder-edged shadows, perfect for dramatic looks and emphasizing texture. A white-coated dish offers a softer, more diffused light with gentler transitions, ideal for a subtler, more delicate effect.
- Add a Fill Reflector: Place a white or silver reflector just below the subject's chest, angled up toward their face. This will bounce light back into the shadows, softening them and brightening the eyes for a classic beauty or headshot look.
- Use a Diffusion Sock: For a gentler quality of light that moves closer to that of a small softbox, attach a diffusion sock (or "shower cap") over the front of the dish. This is great for when you want the characteristic shape of the light but with less intensity.
Mastering the beauty dish allows a photographer to create polished, high-fashion portraits with a signature look. For those looking to achieve this professional quality in their own work, you can see examples and learn more about expert portrait techniques in Miami.
6. Umbrella Lighting
An umbrella is often a photographer's first introduction to light modification, celebrated for its simplicity, portability, and affordability. As one of the most accessible tools for creating the best lighting for portrait photography, it works by taking a small, hard light source, like a flash or strobe, and transforming it into a much larger, softer source. Umbrellas come in two primary types: shoot-through and reflective.
A shoot-through umbrella is made of translucent white fabric that you fire the light through, diffusing it and creating a very soft, broad light. A reflective umbrella has an opaque exterior and a reflective interior (typically white, silver, or gold) that you bounce the light into, which then reflects back onto your subject. This ease of use and rapid setup makes them a staple for photographers who need to move quickly, such as at weddings or on-location events.
Why Umbrellas are Essential
Umbrellas are masters of creating broad, soft, and forgiving light with minimal effort. Their wide light spread is excellent for illuminating groups or lighting a subject and their immediate environment simultaneously. While they offer less precise control than a softbox, their efficiency is unmatched. Event photographers, in particular, rely on them for portable portrait stations, and their low cost makes them a cornerstone of starter kits from brands like Paul C. Buff, helping new photographers grasp the fundamentals of modified light.
The famous Photek Softlighter, a hybrid that combines an umbrella's shape with a diffusion panel, showcases the quest to merge an umbrella's broad softness with a softbox's quality, demonstrating its foundational importance in lighting.
Actionable Tips for Using Umbrellas
To effectively harness umbrella lighting, apply these practical techniques:
- Choose Your Type: Use a white shoot-through umbrella for the softest, most diffused light, ideal for flattering headshots and beauty work. Opt for a silver reflective umbrella when you need more contrast and a punchier, more specular highlight in your portraits.
- Proximity for Softness: Just like a softbox, the closer the umbrella is to your subject, the softer the light and shadows will be. Moving it further away will produce harder shadows and a wider, more even light spread.
- Feather the Light: Angle the umbrella so the edge of its light "feathers" across your subject rather than pointing directly at them. This technique creates a beautiful, gradual falloff and a less direct, more flattering illumination.
- Beware of Wind: Due to their shape, umbrellas act like sails outdoors and can easily be caught by the wind. Always use sandbags to secure your light stands to prevent them from tipping over and damaging your gear.
Umbrellas provide an incredibly effective and efficient way to achieve beautiful light. Their ability to produce soft, appealing results with a simple setup makes them an invaluable asset for photographers at every skill level, especially those just beginning to explore off-camera flash.
7. Continuous LED Panel Lighting
Continuous LED panel lighting has rapidly emerged as a powerful and user-friendly solution, securing its place as a top contender for the best lighting for portrait photography. Unlike strobes that fire a momentary flash, LED panels provide constant illumination, allowing you to see exactly how the light is falling on your subject in real-time. This what-you-see-is-what-you-get approach demystifies the lighting process, making it ideal for both beginners and seasoned professionals.
Modern LED panels are packed with advanced features like bi-color temperature control, which lets you adjust from warm to cool light to match any ambient conditions. They also boast high Color Rendering Index (CRI) ratings, ensuring that skin tones and clothing colors are rendered accurately and vibrantly. This blend of instant feedback, control, and color fidelity has made them indispensable for hybrid shooters who need to switch seamlessly between photo and video.
Why LED Panels are Essential
LED panels are celebrated for their versatility and efficiency. Their constant light source is less intimidating for subjects, especially children or those unaccustomed to being in front of a camera, as there are no startling flashes. This makes it easier to capture genuine expressions. Pioneers in the space like Aputure and Godox have pushed the technology forward, creating powerful, portable, and quiet units that are perfect for studio and on-location work.
This technology is a favorite among YouTube content creators who require consistent, flattering light for their videos, and corporate headshot photographers who value the comfort and speed it affords their clients. The ability to dial in the exact brightness and color temperature on the fly is a massive workflow advantage, allowing for quick adjustments without moving the light itself.
Actionable Tips for Using LED Panels
To effectively use continuous LED panels for your portraits, implement these techniques:
- Prioritize High CRI: Always choose panels with a CRI rating of 95 or higher. This ensures that the colors in your portraits, particularly skin tones, are accurate and true to life, saving you significant time in post-processing.
- Soften the Source: Direct light from an LED panel can be harsh. Use the built-in diffusion panels or attach a small softbox designed for LEDs to soften the light, creating a more flattering look and minimizing skin imperfections.
- Match Ambient Light: Use the bi-color temperature control to match the color of the ambient light in your environment. This creates a more cohesive and natural-looking image, whether you're blending your LEDs with daylight from a window or warm indoor lighting.
- Go Big and Battery-Powered: For softer light, a larger panel is better as it creates a broader source. For on-location shoots, battery-powered models provide incredible flexibility, freeing you from the constraints of power outlets. Many photographers find these units essential, as explained in this guide to wedding photography lighting gear.
Continuous LED panels offer a modern, intuitive approach to portrait lighting. Their ability to provide high-quality, adjustable, and constant light makes them an incredibly powerful tool for photographers who need reliable and consistent results for both still images and video.
Best Lighting Methods for Portrait Photography Comparison
Lighting Method
Implementation Complexity 🔄
Resource Requirements 💡
Expected Outcomes ⭐📊
Ideal Use Cases 💡
Key Advantages ⚡
Softbox Lighting
Medium – requires setup and space 🔄
Moderate – light source, softbox, stand
Soft, even, flattering light with minimal shadows ⭐📊
Portraits, fashion, corporate headshots
Directional control, professional, versatile ⚡
Ring Light Setup
Low – simple mount and power 🔄
Low – ring light, camera/phone holder
Shadowless, even illumination with circular catchlights ⭐📊
Beauty shots, social media, video calls
Easy setup, portable, affordable ⚡
Three-Point Lighting Setup
High – multiple lights and ratios 🔄
High – 3 lights, modifiers, stands
Complete control, dimensional and professional look ⭐📊
Studio portraits, film, corporate, dramatic styles
Full control, versatile lighting moods ⚡
Window Light Photography
Very Low – natural light only 🔄
None to minimal – window, reflectors optional
Soft, flattering natural light, variable ⭐📊
Beginners, lifestyle, natural portraits
Free, natural, soft, easy to access ⚡
Beauty Dish Lighting
Medium – precise positioning 🔄
Moderate – beauty dish modifier, light source
Sharp yet soft shadows with bright center ⭐📊
Fashion, beauty, glamour portraits
Unique contrast, skin texture, directional ⚡
Umbrella Lighting
Low – quick setup 🔄
Low – umbrella, light source
Large, soft light with less precision ⭐📊
Events, weddings, beginner portraits
Affordable, portable, quick setup ⚡
Continuous LED Panel
Medium – easy controls, position 🔄
Moderate – LED panel, power source, optional app
WYSIWYG lighting, consistent color, video-ready ⭐📊
Hybrid photo/video, corporate, content creators
Real-time preview, silent operation, color control ⚡
Bringing Your Vision to Life with Light
The journey to mastering portrait photography is, in essence, a journey to mastering light. Throughout this guide, we've navigated seven distinct yet interconnected worlds of illumination. From the soft, forgiving embrace of a large softbox to the precise, dramatic sculpting of a three-point lighting setup, each technique offers a unique language to tell your subject's story. We have seen how a simple window can become a powerful, natural softbox and how a beauty dish can create a signature look for fashion and glamour.
The crucial takeaway is that there is no single "best lighting for portrait photography." The concept is a myth. The truly best lighting is the one that is intentional and purpose-driven, perfectly aligning with the mood, context, and narrative you aim to create. A high-key setup with umbrella lighting might be perfect for a joyful family portrait, while a single, moody LED panel could be ideal for a dramatic, cinematic headshot. The power lies not in owning the most expensive gear, but in understanding how to shape the light you have.
From Theory to Practice: Your Actionable Next Steps
Knowledge without application is just an idea. To truly internalize these concepts, you must put them into practice. Don't feel pressured to master all seven setups at once. Instead, choose a path that aligns with your current resources and creative goals.
-
For the Naturalist: Start with Window Light. Spend a week shooting portraits at different times of day, using only a window and a reflector. Observe how the quality of light changes and how you can manipulate it by changing your subject's distance and angle to the source. This exercise costs nothing but provides invaluable lessons in light quality and direction.
-
For the Aspiring Studio Photographer: Begin with a Single Softbox or Umbrella. Master the fundamentals of key light placement first. Practice creating different lighting patterns like Rembrandt, loop, and split lighting with just one light source. Once you feel confident, introduce a second light as a fill or rim light to build toward a full three-point setup.
-
For the On-the-Go Creator: If you're a vlogger or content creator, a Ring Light or Continuous LED Panel is your most practical starting point. Focus on understanding how distance affects the light's softness and how to balance your artificial light with the ambient light in your environment for a more natural, professional look.
The True Goal: Creating Connection Through Light
Ultimately, lighting is more than a technical skill; it is the primary tool for forging an emotional connection between the subject and the viewer. It directs the eye, enhances texture, defines shape, and, most importantly, establishes a mood. The gentle wrap of a softbox can convey warmth and accessibility, while the crisp edge from a beauty dish can communicate confidence and power.
By understanding these techniques, you move from being a picture-taker to a storyteller. You gain the confidence to walk into any environment, assess the available light (or lack thereof), and confidently build a scene that brings your creative vision to life. This mastery transforms your work, elevating your portraits from simple snapshots to compelling, evocative pieces of art that resonate deeply. Keep experimenting, stay curious, and remember that every shadow you cast is as important as the light you create. Your unique voice as a photographer is waiting to be expressed through the beautiful, versatile medium of light.
Ready to see how professional lighting transforms a portrait session? At Candid Studios, our expertise in shaping light is at the core of every photograph we create, ensuring you look your absolute best. Book a session with us and experience the art of portrait lighting firsthand by visiting Candid Studios.